 Seldon Enterprise Platform Documentation Update
Tabular Data Classification on Income Dataset
In this demo we will:
Create a pipeline which can be used to classify tabular data
Send a request to get a prediction
Create an explainer - either an anchor or kernel SHAP explainer
Send a request to a prediction pipeline
View the explanation
Register an income classifier model
Register a pre-trained income classifier SKLearn model. See the “Register an income classifier model” section in the Drift Detection demo for detailed instructions.
Configure predictions schema for classifier
Edit the model metadata to update the prediction schema for the model. See the “Configure predictions schema for classifier” section in the Drift Detection demo for detailed instructions.
Launch a Seldon ML Pipeline
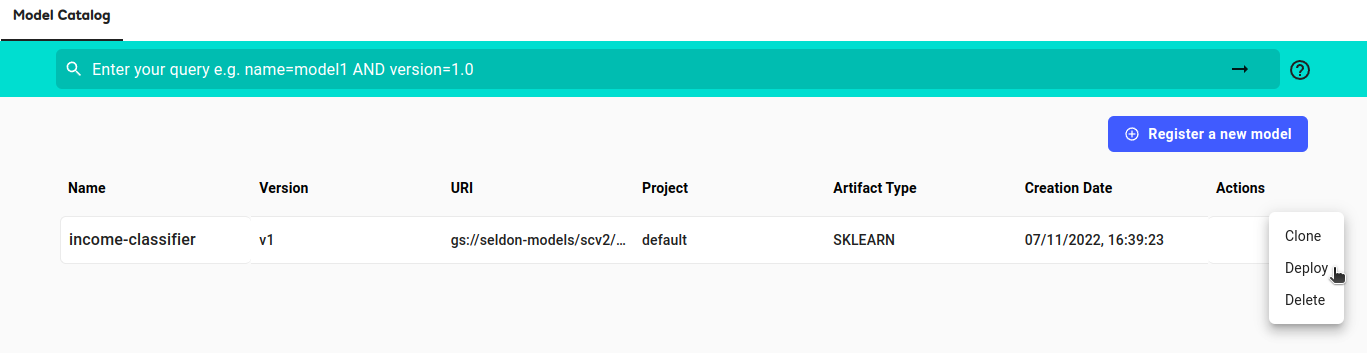
Deploy the income classifier model from the catalog into an appropriate namespace
From the model catalog, under the
Actiondropdown list, selectDeploy.Expand to see deploy model
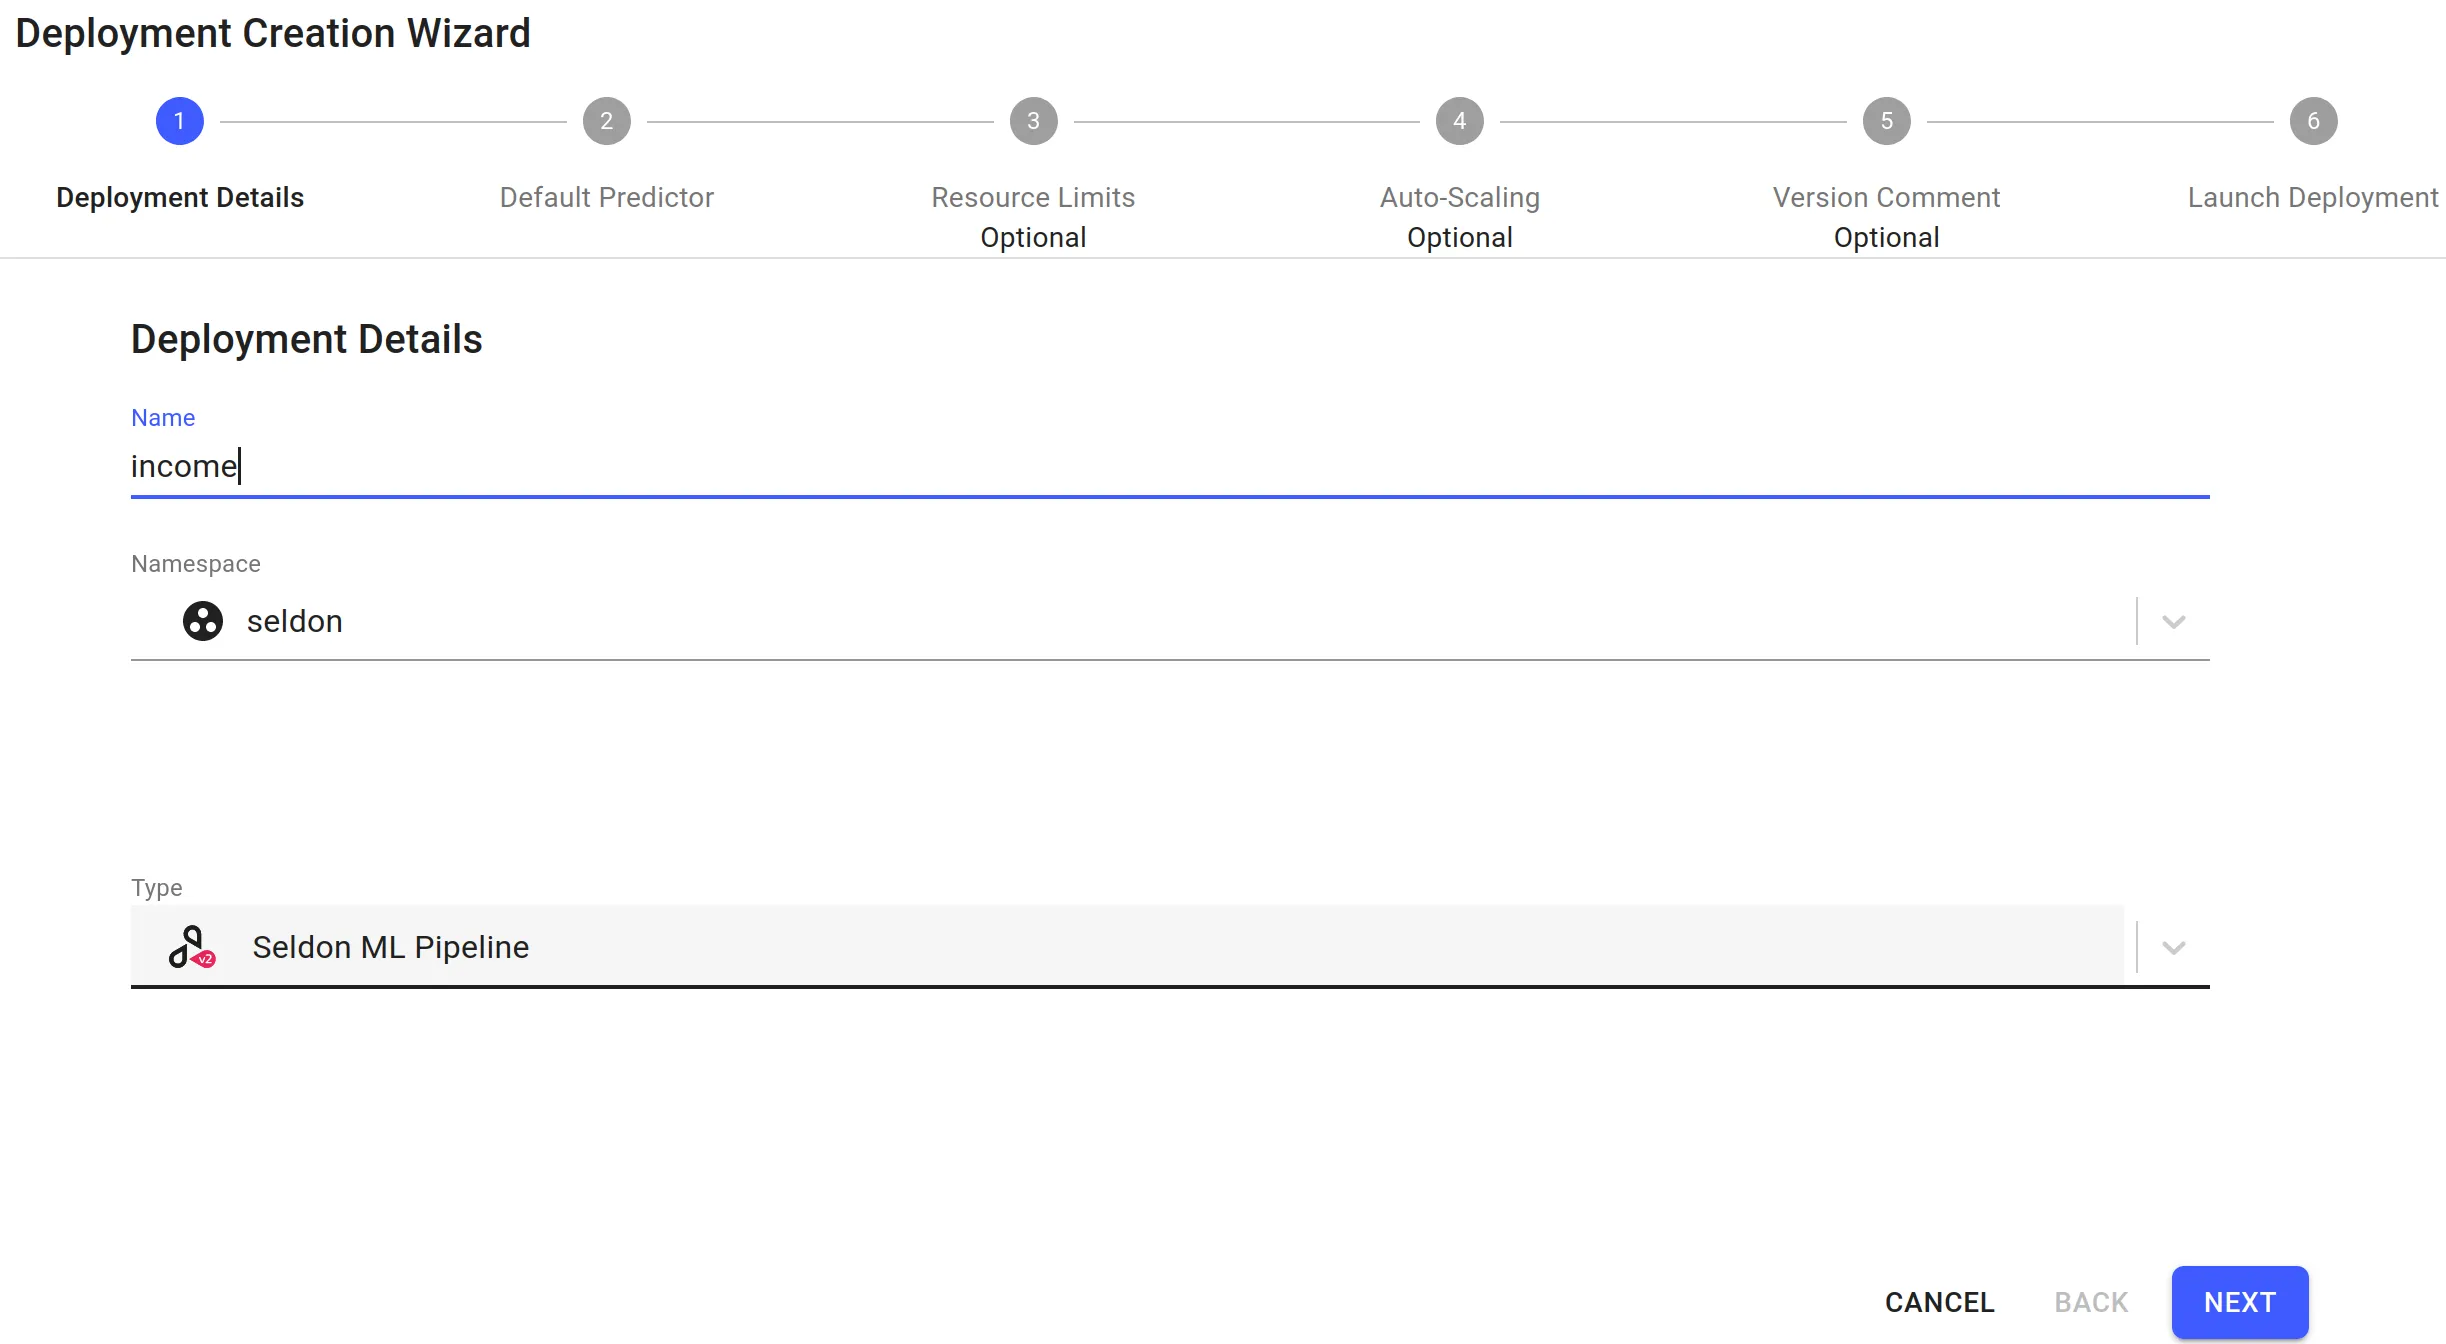
Enter the deployment details in the deployment creation wizard and click
Next:Name: income
Namespace: seldon
Type: Seldon ML Pipeline
Expand to see deploy pipeline
The predictor details should already be filled in from the model catalog. Click
Next.Click
Nextfor the remaining steps, then clickLaunch.
Get Predictions
Click on the
incomepipeline created in the previous section to enter the deployment dashboard.Inside the deployment dashboard, on the left navigation drawer, click on the
Predictbutton.On the
Predictpage, enter the following text:
{
  "inputs": [
    {
      "name": "income",
      "datatype": "INT64",
      "shape": [1, 12],
      "data": [53, 4, 0, 2, 8, 4, 2, 0, 0, 0, 60, 9]
    }
  ]
}
Click the
Predictbutton.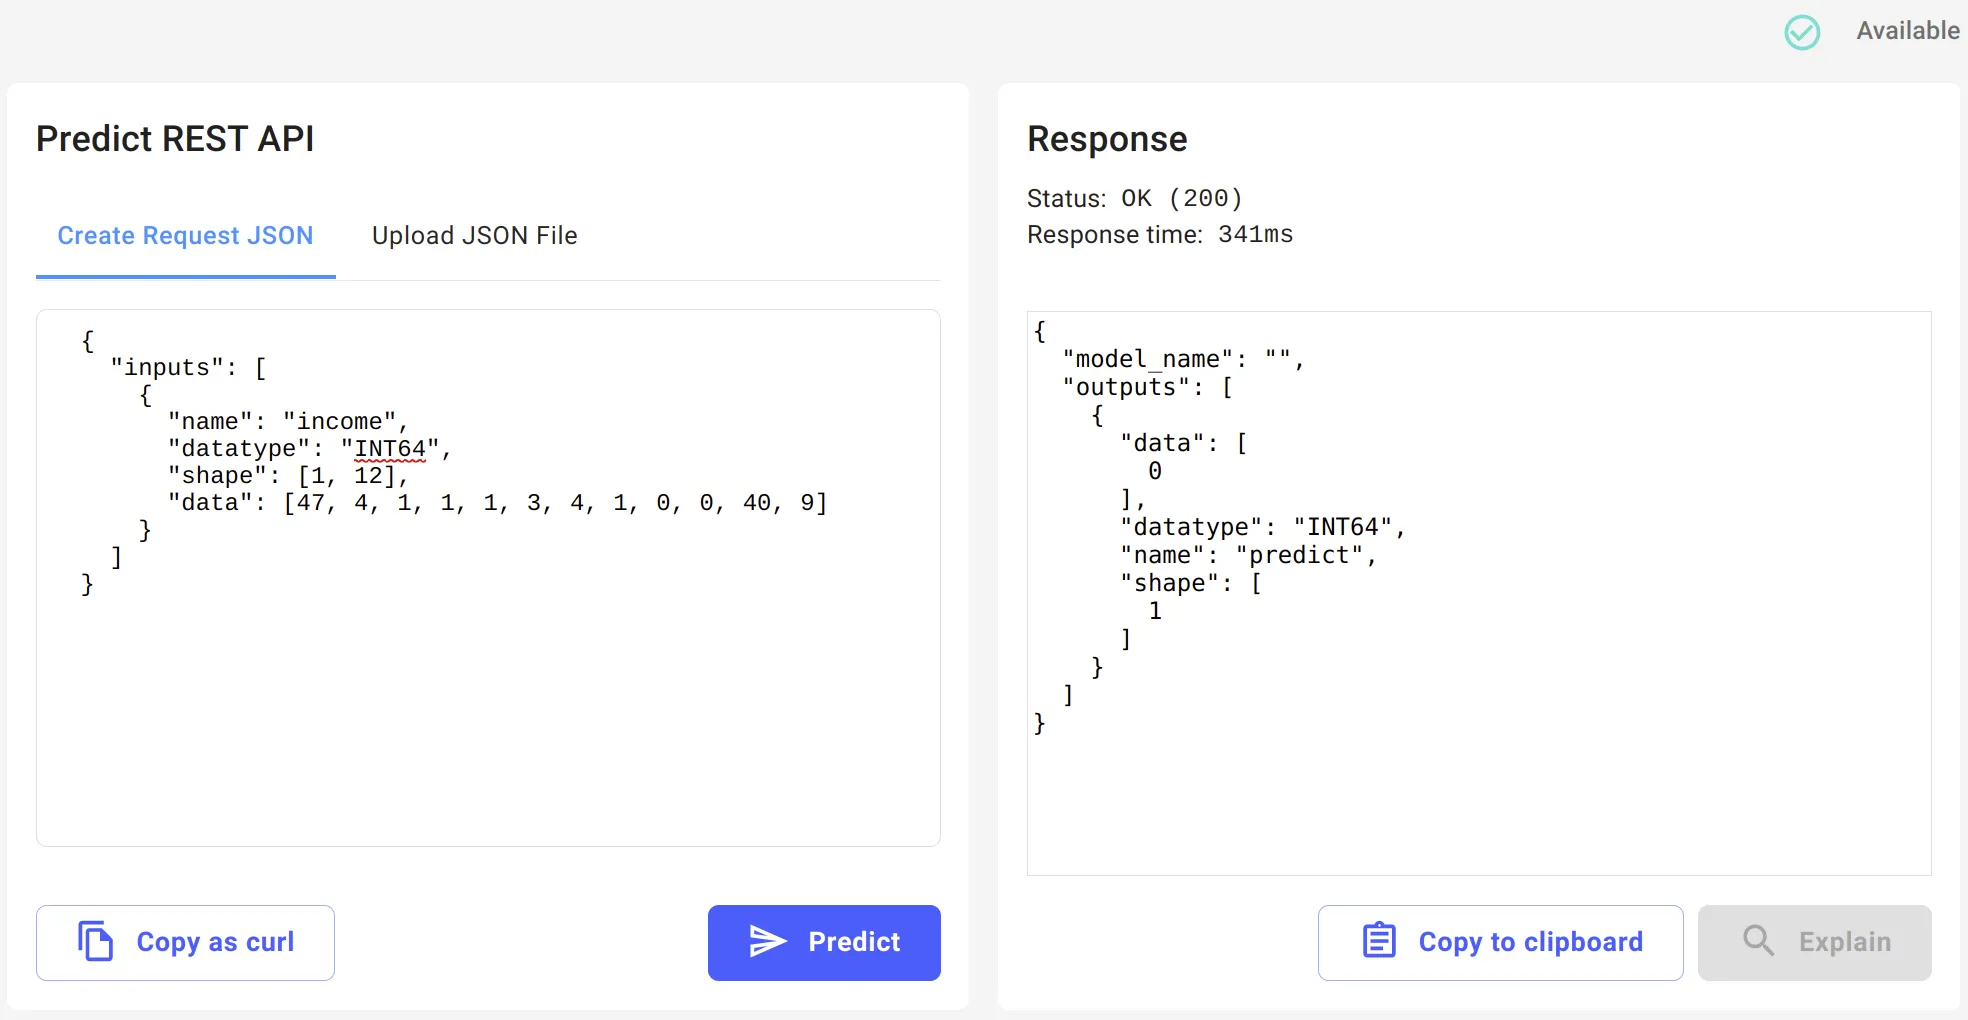
Add an Explainer
There are currently 2 explainers available for tabular data classification:
Anchor Explainer
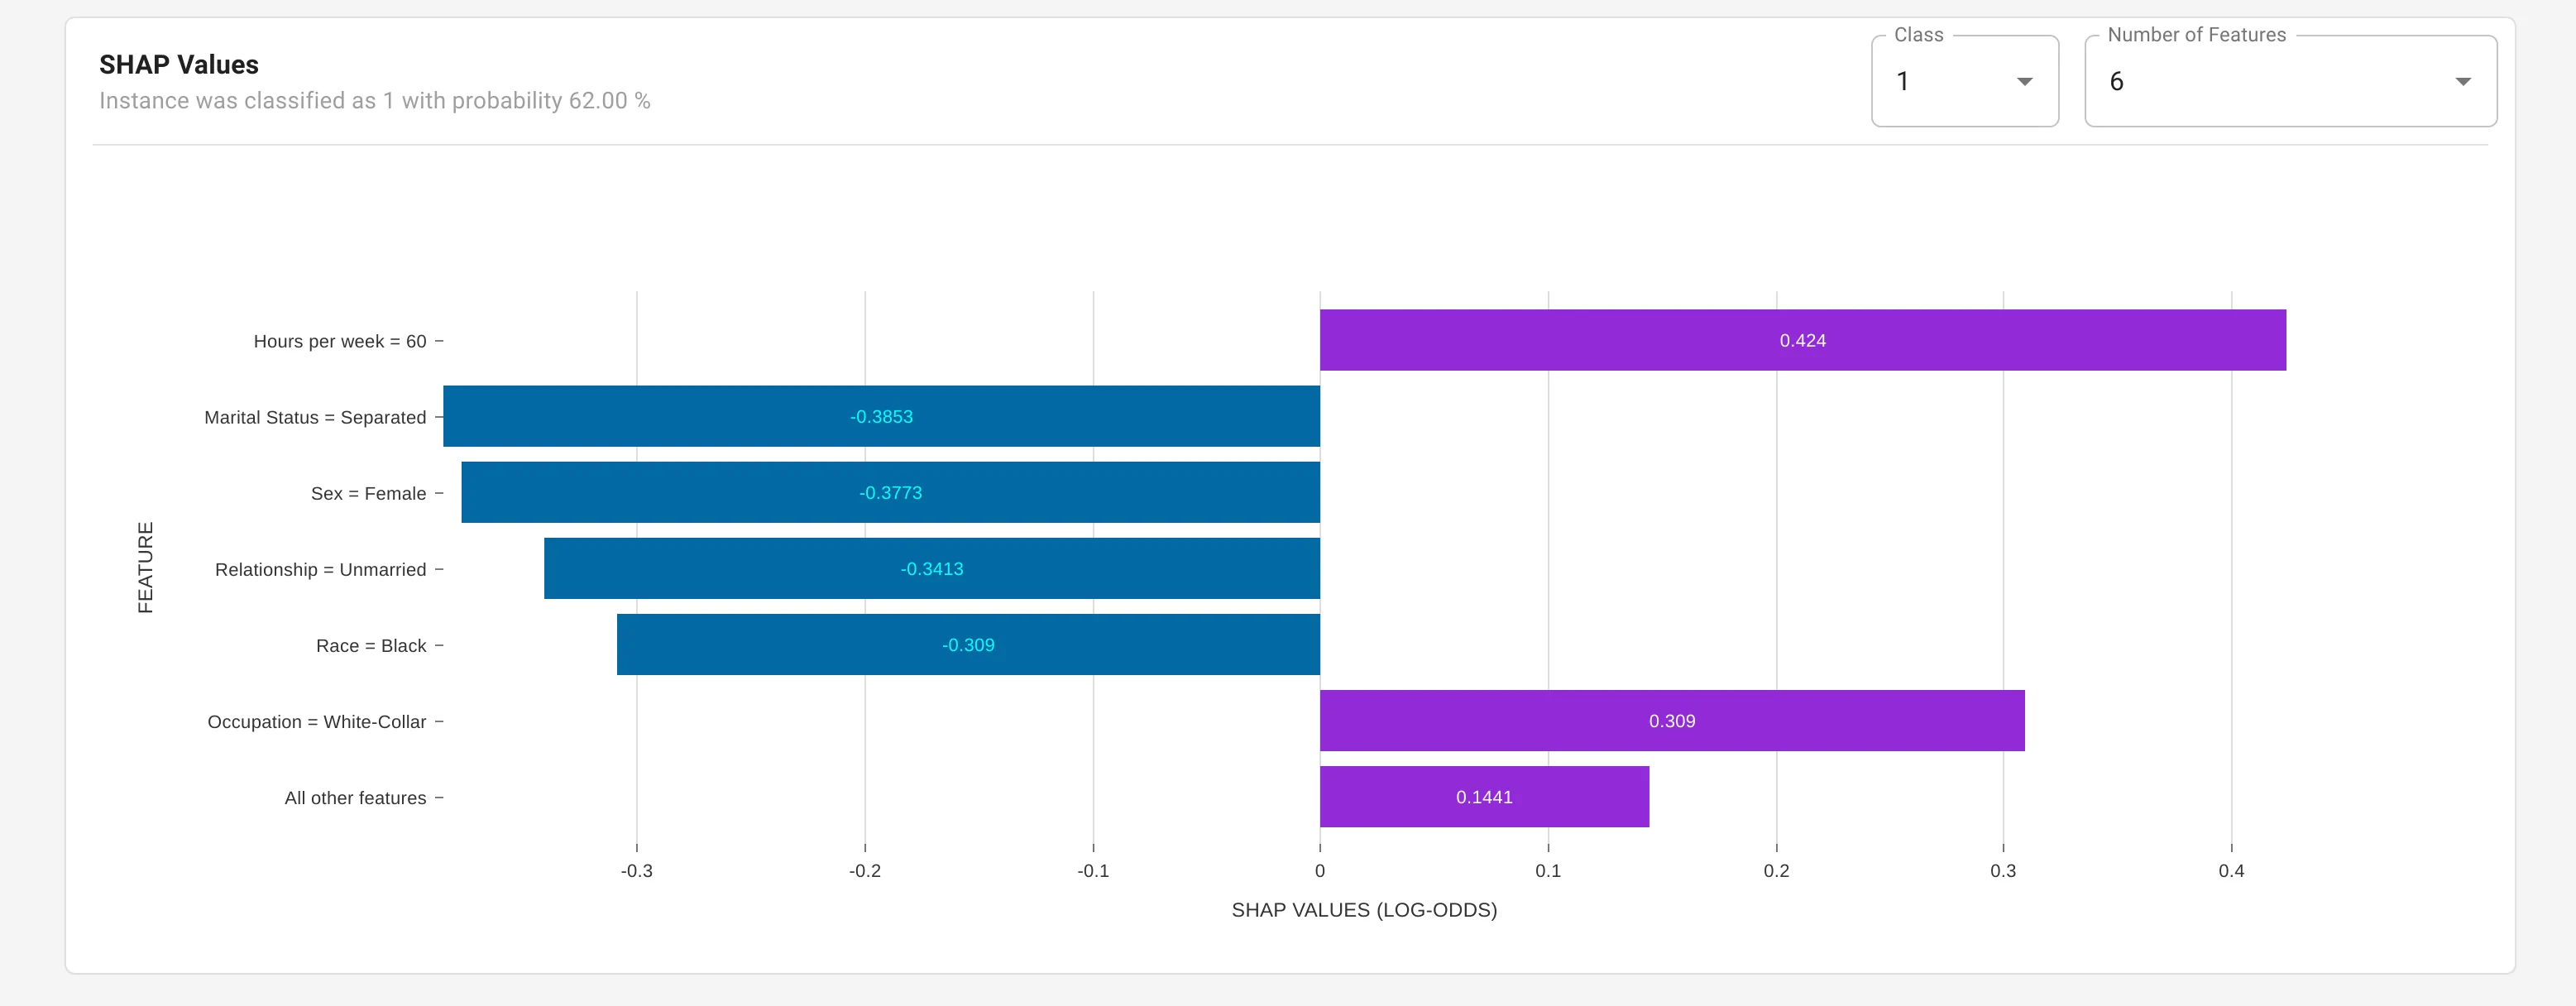
Kernel SHAP Explainer
From the
incomedeployment dashboard, clickAddinside theModel Explanationcard.For step 1 of the Explainer Configuration Wizard, select
Tabularthen clickNext.For step 2, set the following details:
- Explainer Algorithm: Anchor
In step 3, set the following details:
   - Explainer URI: gs://seldon-models/scv2/samples/mlserver_1.4.0/income-sklearn/anchor-explainer
   - Explainer Project: default
For step 2, set the following details:
- Explainer Algorithm: KernelShap
In step 3, set the following details:
   - Explainer URI: gs://seldon-models/scv2/samples/mlserver_1.4.0/income-sklearn/kernel-shap-explainer
   - Explainer Project: default
Skip step 4
For step 5, set following details
- Memory: 1Gi
Skip the remaining steps without changing fields, and click
Launch.
After a short while, the explainer should become available.
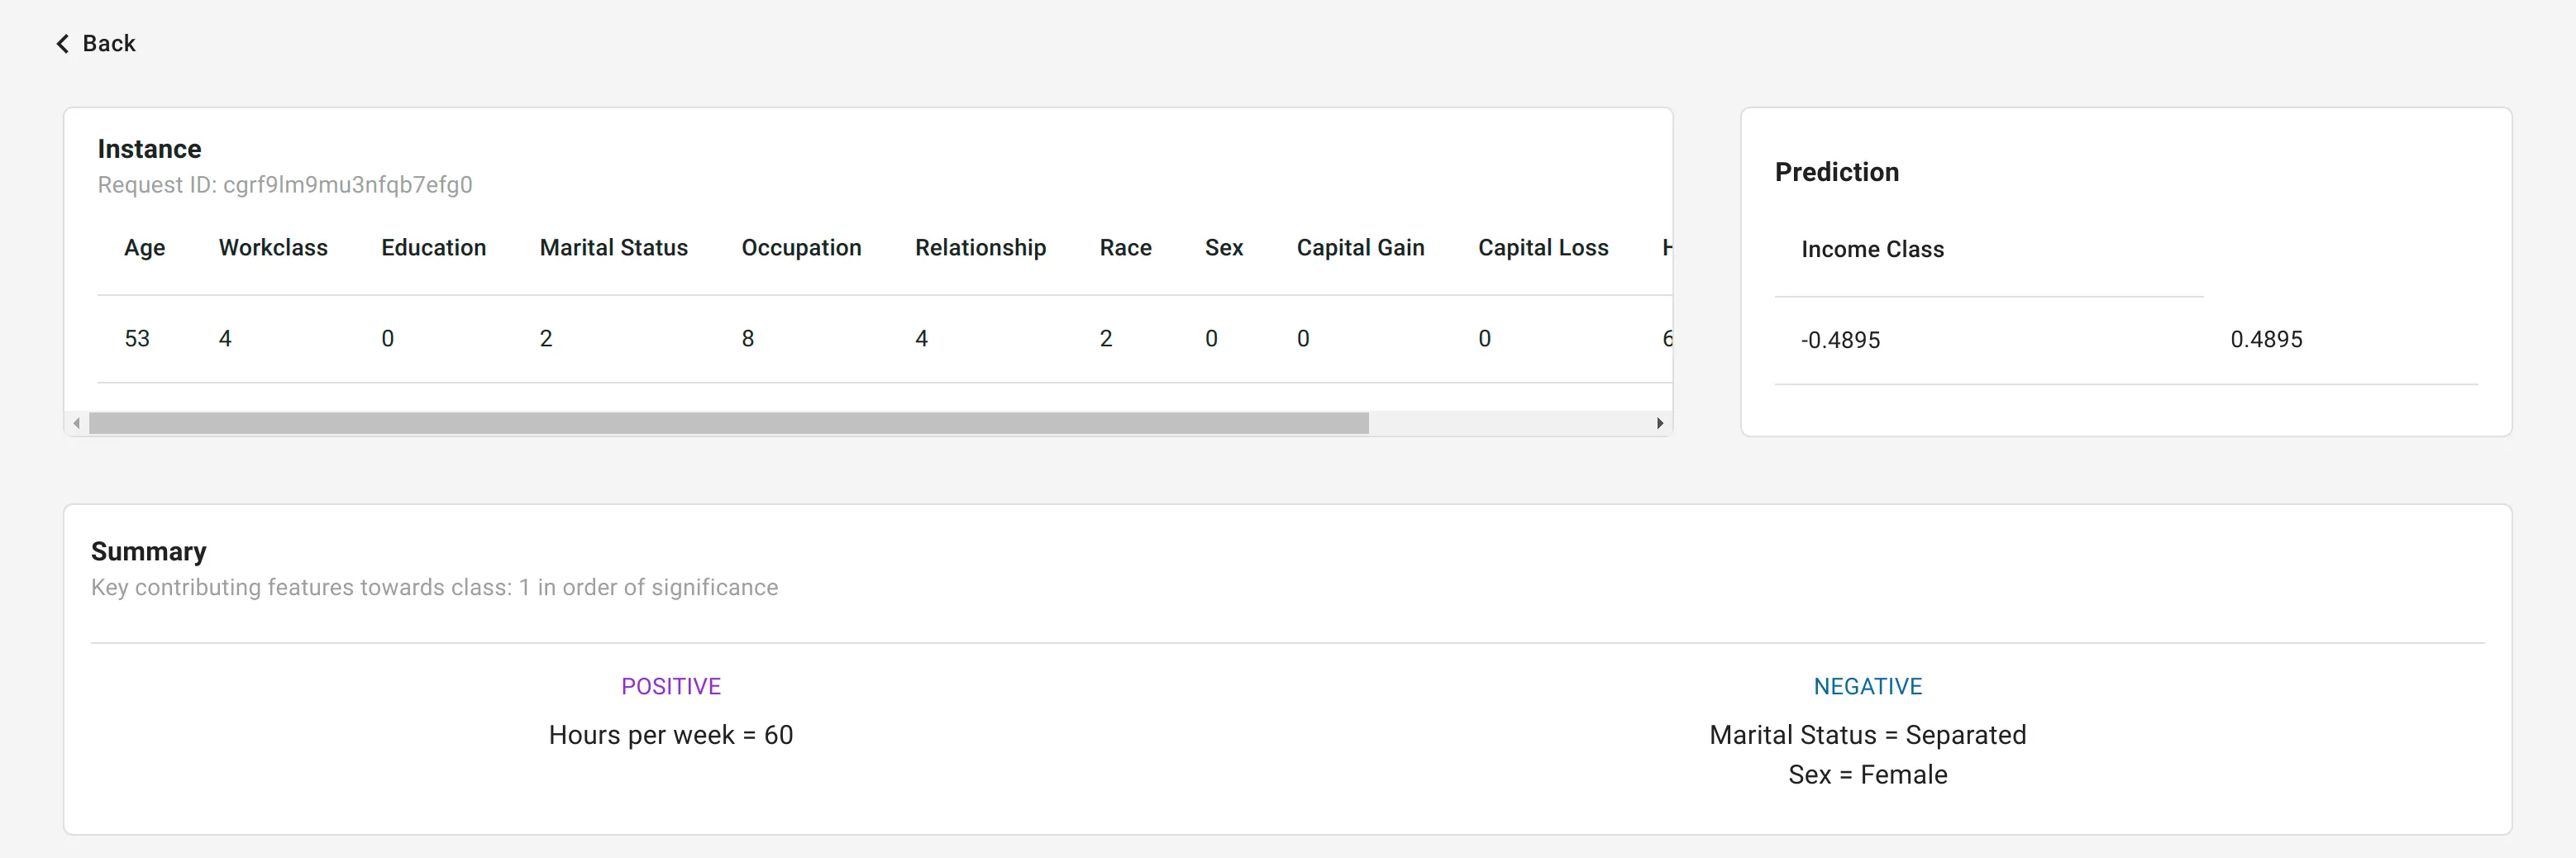
Get Explanation for a Prediction
Navigate to the
Requestspage using the left navigation drawer.Click on the
View explanationbutton to generate explanations for the request.
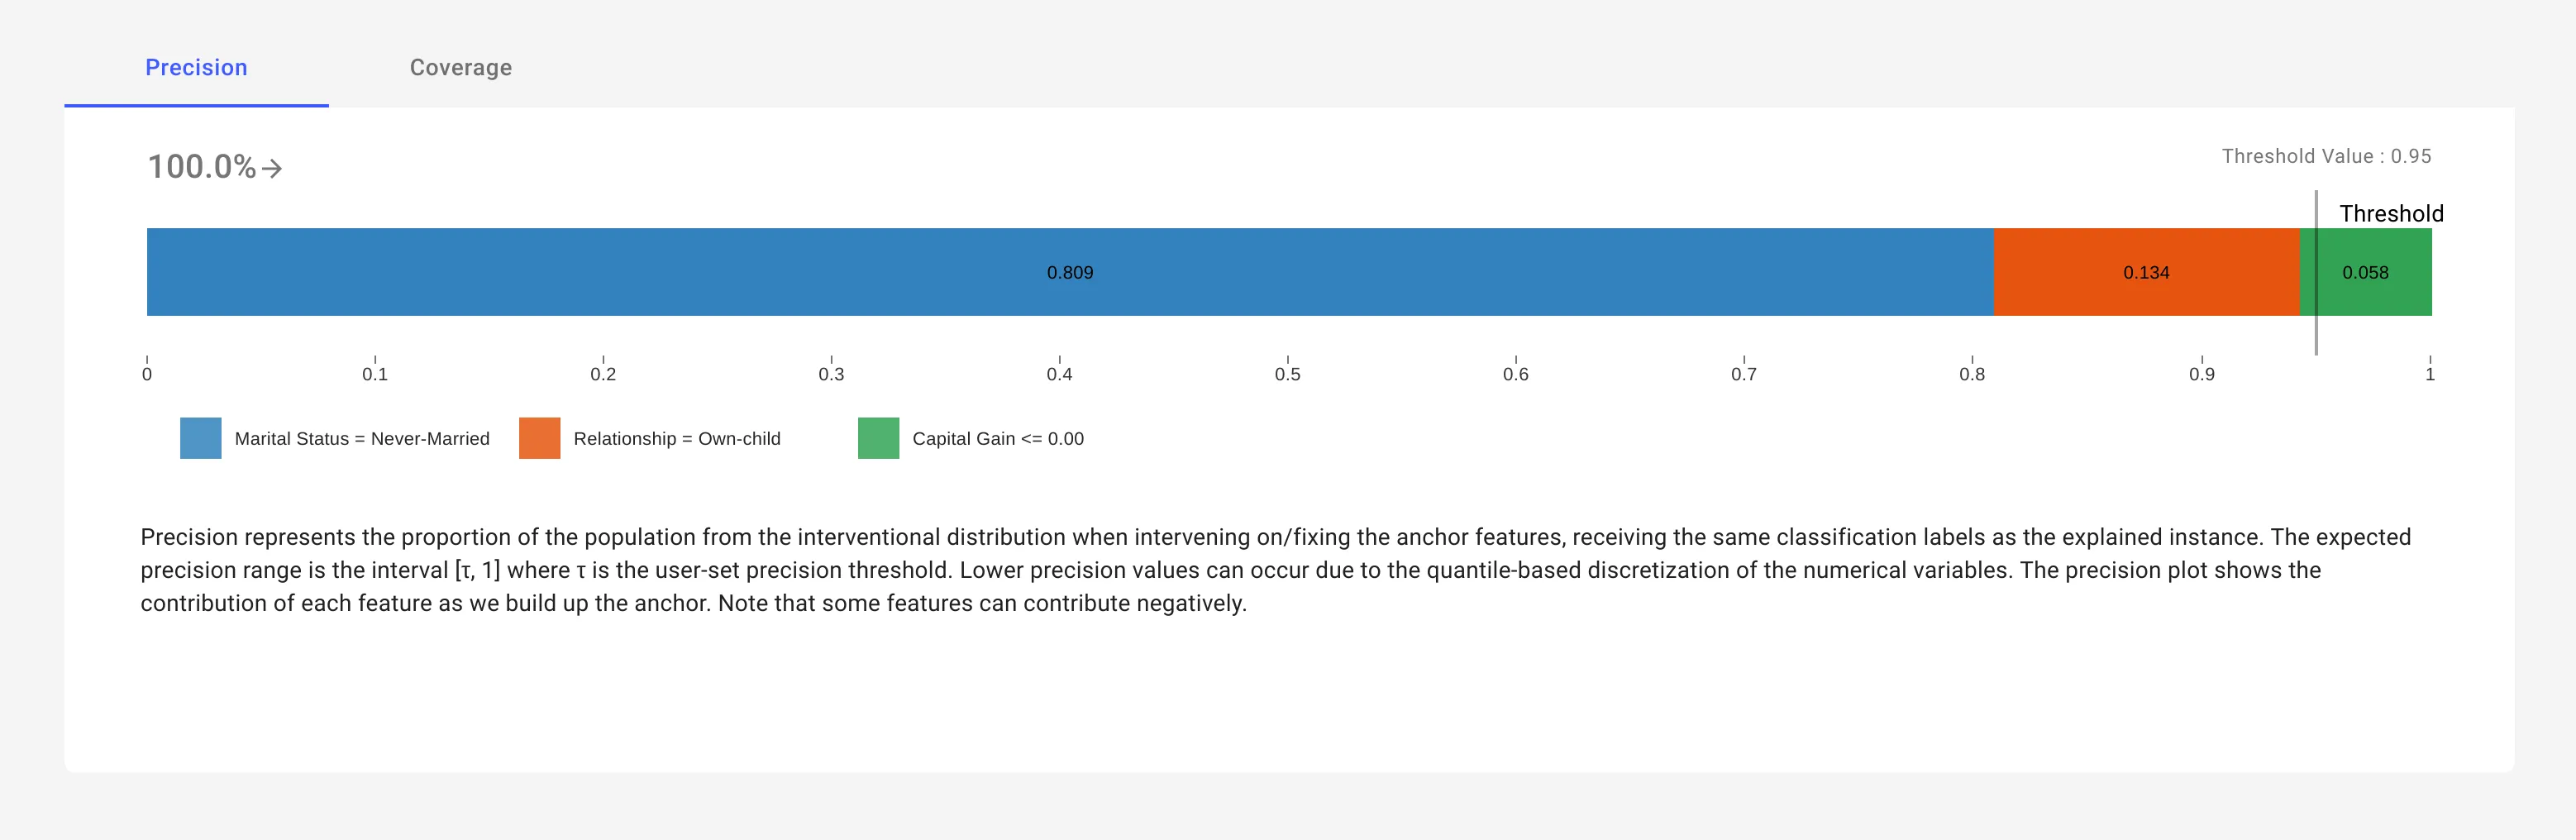
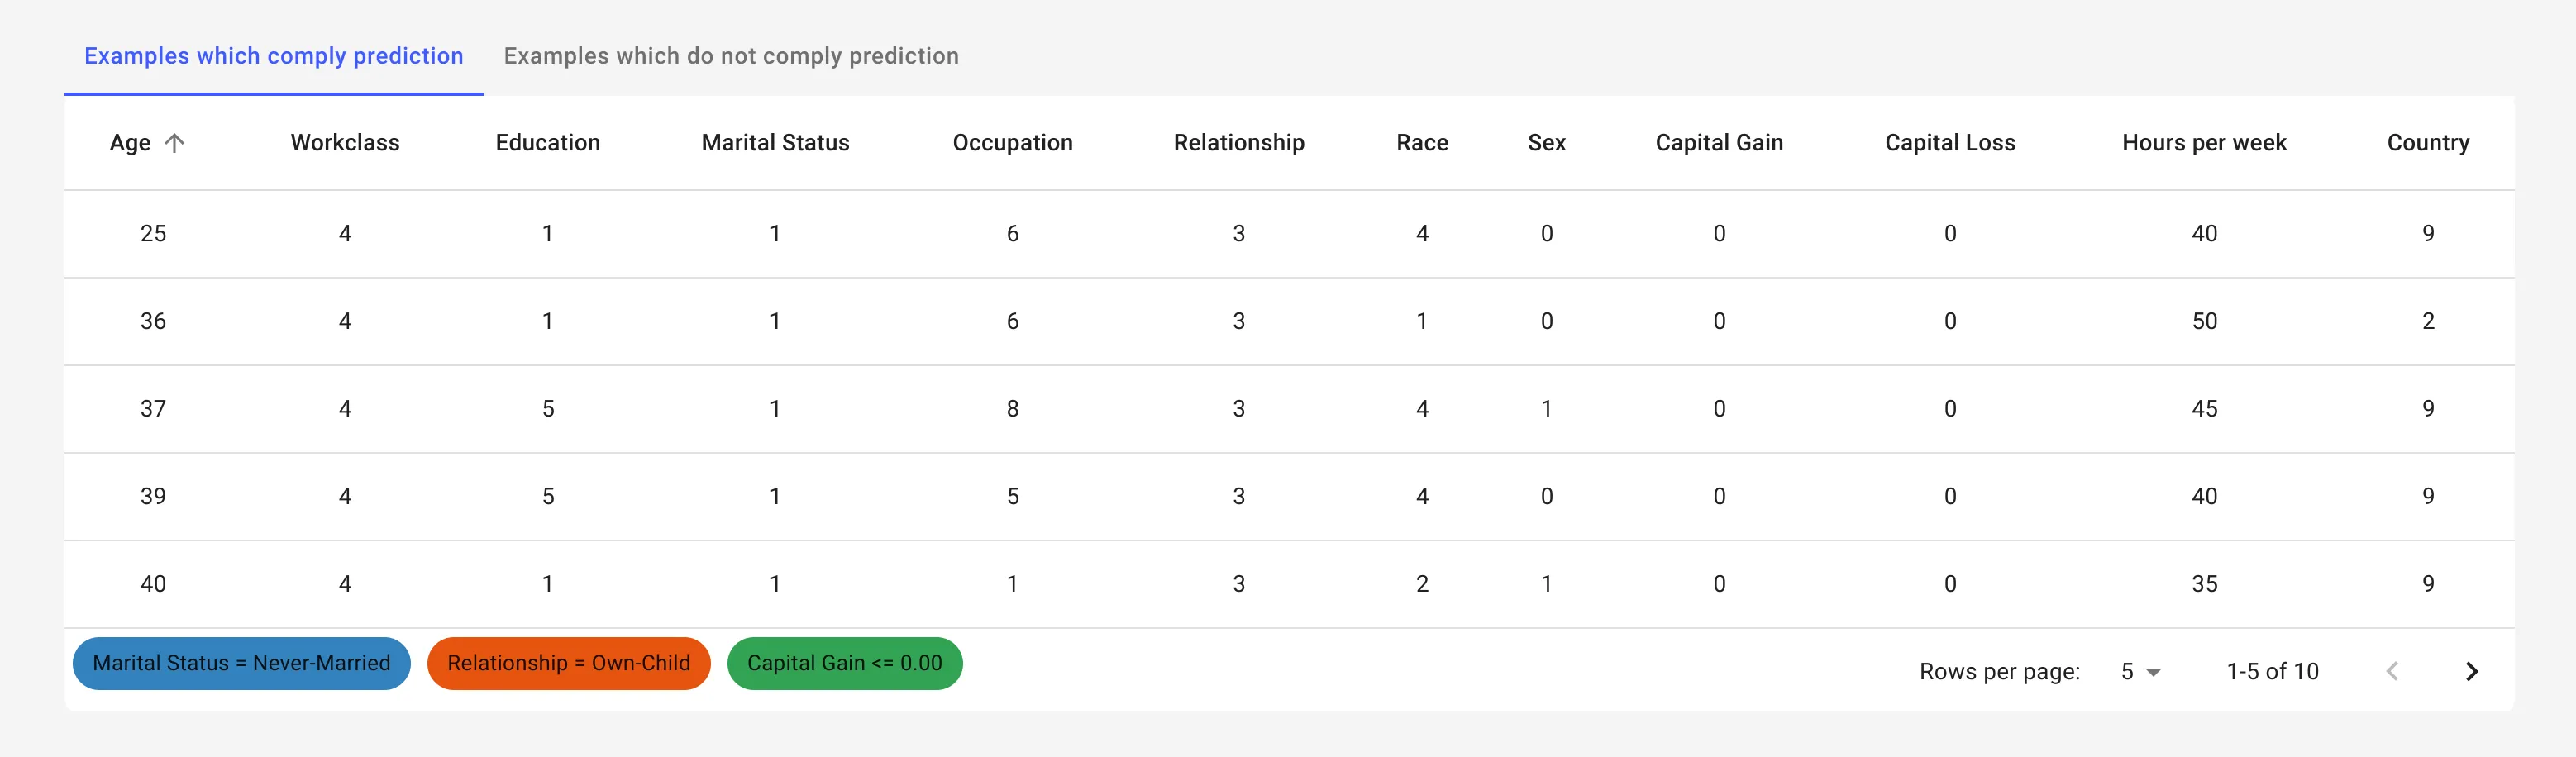
Congratulations, you’ve created an explanation for the request! 🥳