Seldon Enterprise Platform Documentation Update
Feature Distributions Monitoring
Distributions monitoring provides an ability to view the statistics and distributions of features and predictions made by your model between any given time. This feature also enables you to draw comparisons between the model predictions for different feature combinations, cohorts and/or time slices. It is a vital aspect of model monitoring cycle to understand if the deployed model has the desired prediction characteristics during different times and for different cohorts.
This demo uses a model trained to predict high or low income based on demographic features from a 1996 US census. In this demo we will observe the predictions and feature distributions of live predictions made using this model with the following steps:
Register an income classifier model with the relevant predictions schema
Launch a Seldon Core deployment with the income classifier model
Make predictions using a REST requests to the model deployment
Observe the feature distributions of the live predictions
Filter distributions by time or predictions and feature level filters
Note
Under the production installation, the following must be installed:
Elasticsearch (required) - used for storage of live predictions and reference data
Metadata storage (required) - used for storage of model metadata (which includes the prediction schema)
Argo Workflows (required for demo) - allows for batch jobs to be run
MinIO (optional) - allows for easy storage of and access to downloaded datasets
In addition to the prerequisites, this demo needs the request logger to connect to Seldon Enterprise Platform in order to fetch model level predictions schema. This requires specific request logger configuration. Also this feature is supported with many protocols available with deployments like seldon, tensorflow and the kfserving v2 protocols. Support for json data, string data, bytes payload or multi-node graph use cases is not available yet.
Register an income classifier model
Register a previously trained income classifier SKLearn model stored publicly in this Google bucket: gs://seldon-models/sklearn/income/model-0.23.2
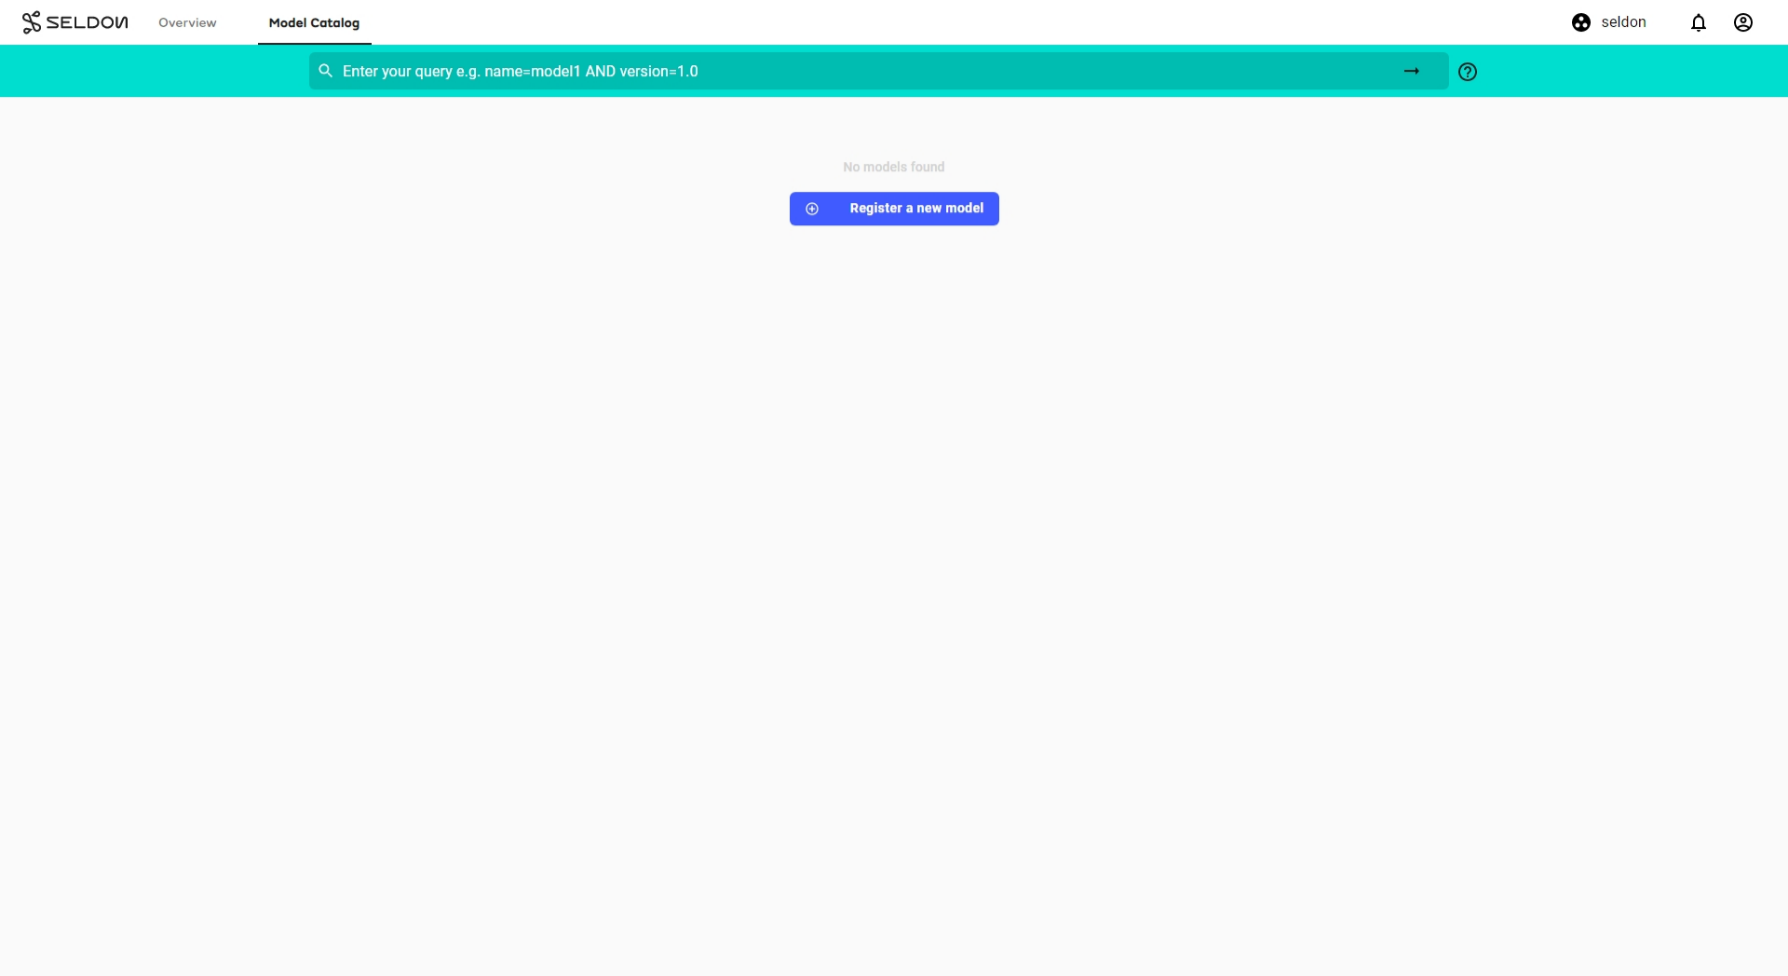
In the
Model Cataloguepage, click theRegister New Modelbutton:Expand to see the 'Register New Model' button
In the
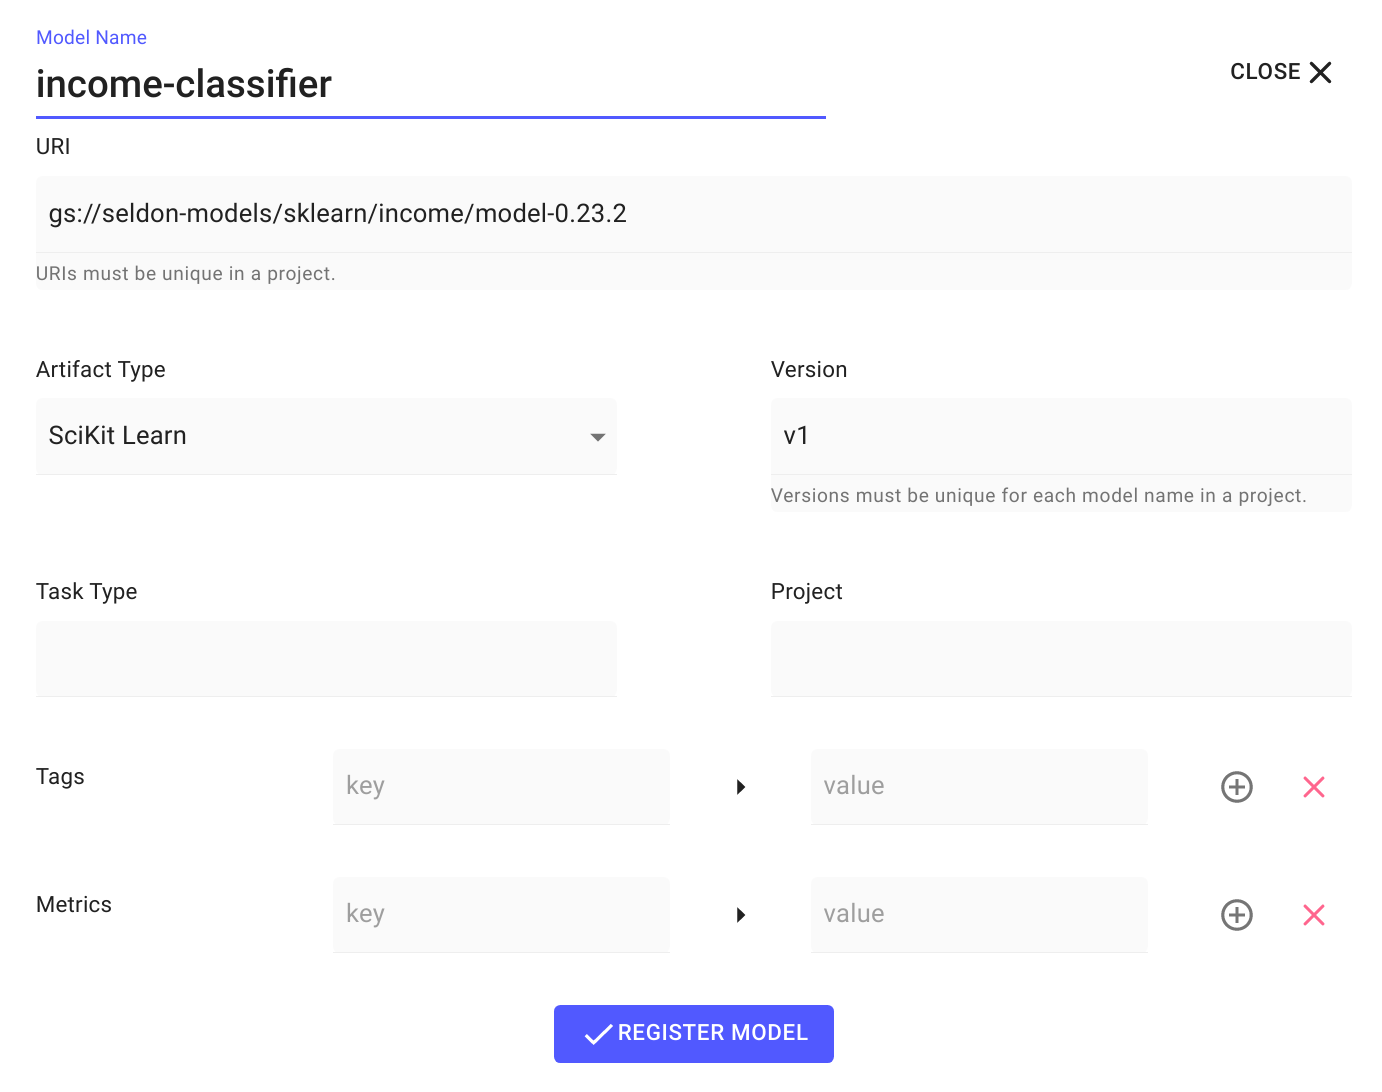
Register New Modelwizard, enter the following information, then clickREGISTER MODEL:Model Name:
income-classifierURI:
gs://seldon-models/sklearn/income/model-0.23.2Artifact Type:
SciKit LearnVersion:
v1
Expand to see model configuration
Configure predictions schema for classifier
Edit the model metadata to update the prediction schema for the model.
The prediction schema is a generic schema structure for machine learning model predictions.
It is a definition of feature inputs and output targets from the model prediction.
Use the income classifier model predictions schema to edit and save the model level metadata.
Learn more about the predictions schema at the ML Predictions Schema open source repository.
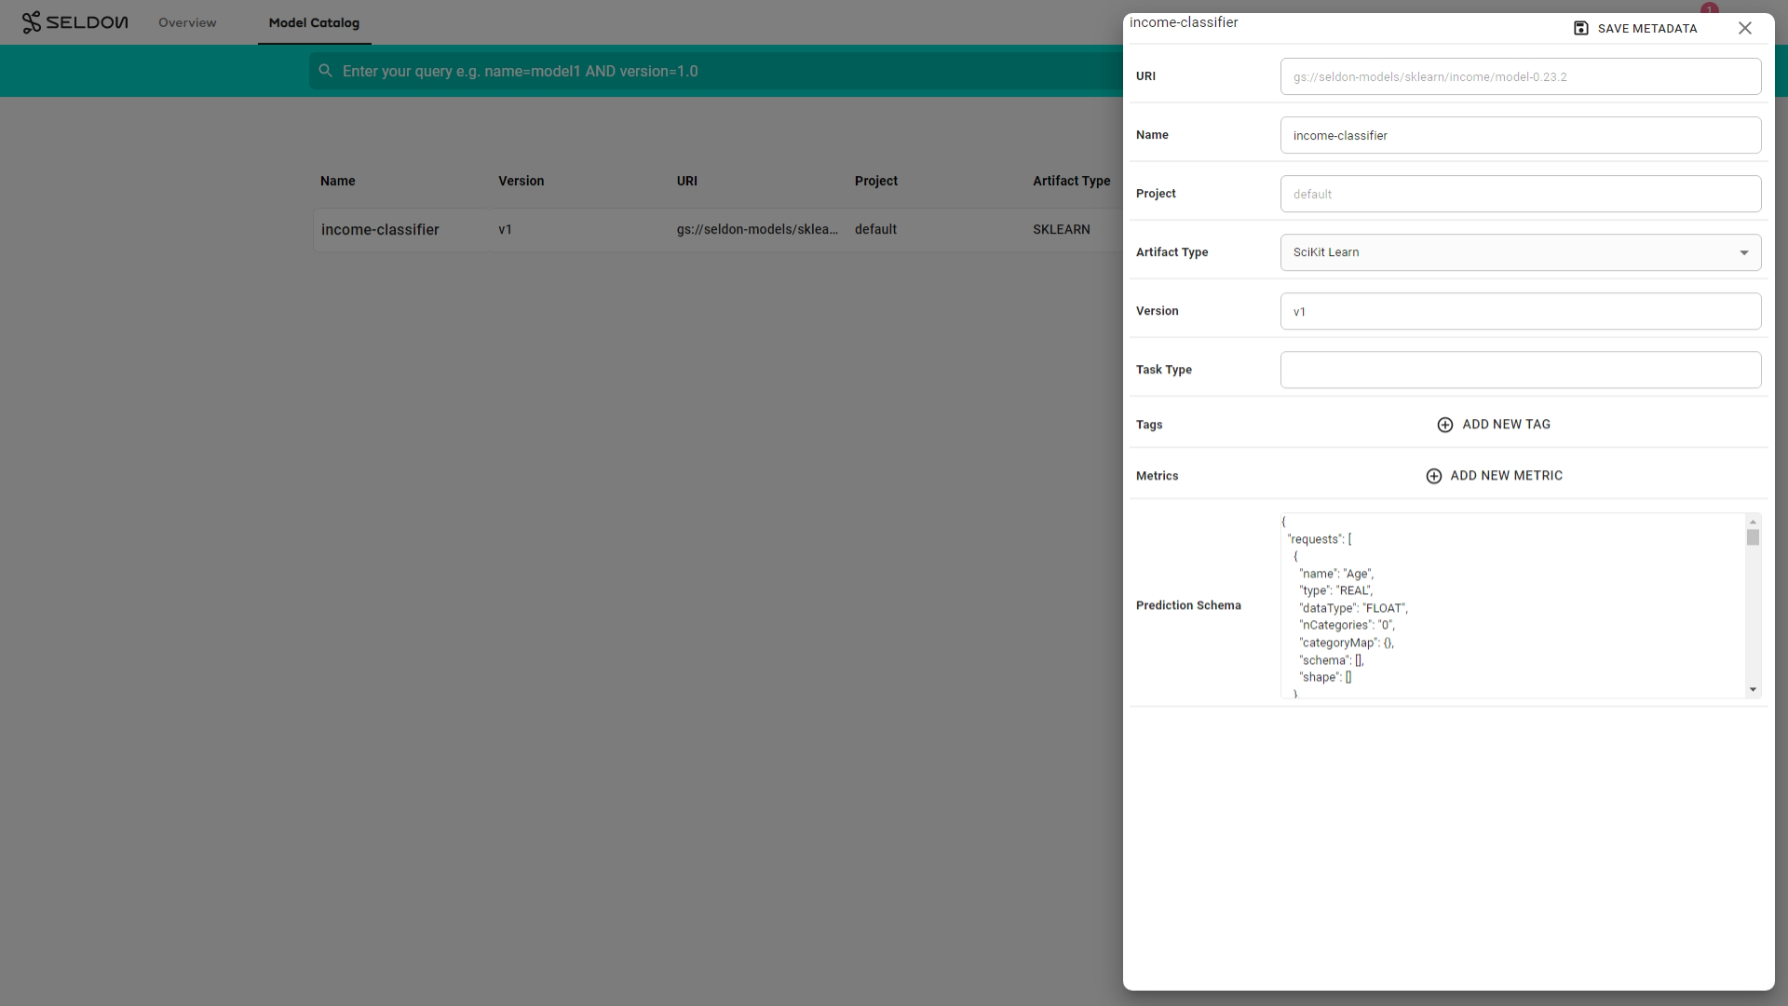
Click on the model
income-classifiermodel that you have just registered.Click the
Edit Metadatabutton.Paste the
prediction schemaand clickSave Metadata.Expand to see configure prediction schema
Launch a Seldon Core deployment
Deploy the income classifier model from the catalogue into an appropriate namespace
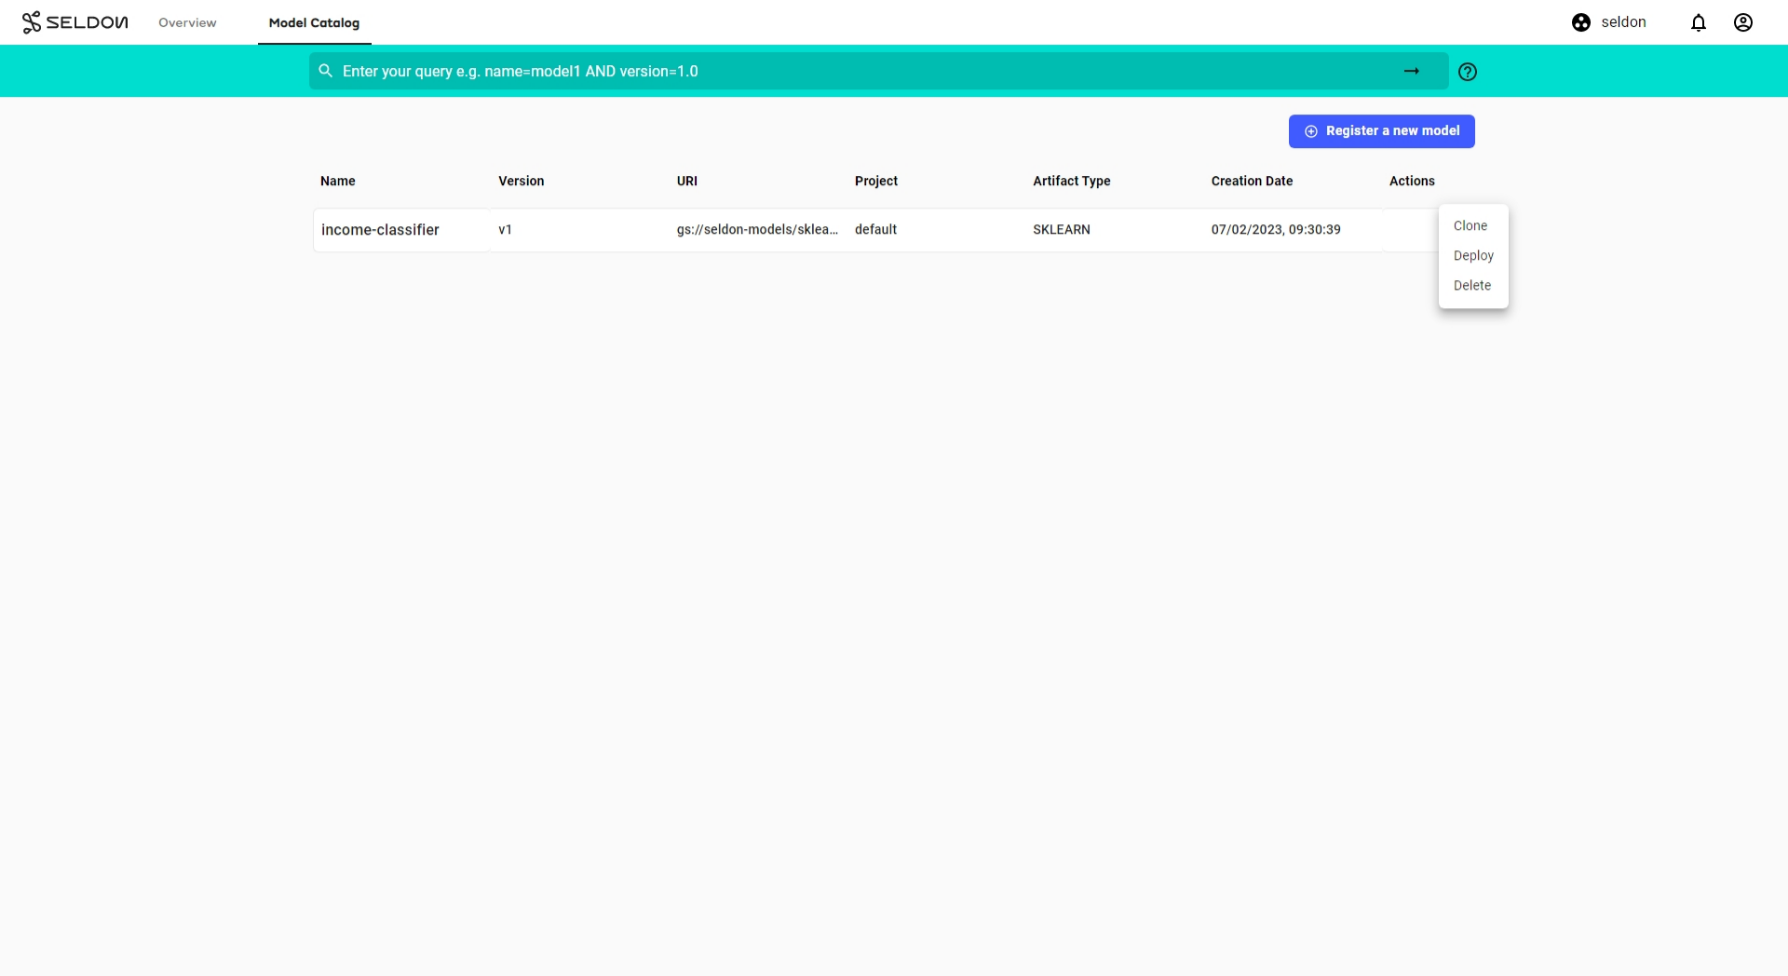
From the model catalogue, under the
Actiondropdown list, selectDeploy.Expand to see deploy model
Enter the deployment details in the deployment creation wizard and click
Next:Name:
income-classifierType:
Seldon DeploymentProtocol:
Seldon
Expand to see deploy model
In the deployment creation wizard, enter a name for your new deployment (e.g.
income-classifier). Select the namespace you would like the deployment to reside in (e.g.seldon). From the protocol dropdown menu, select Seldon and click Next.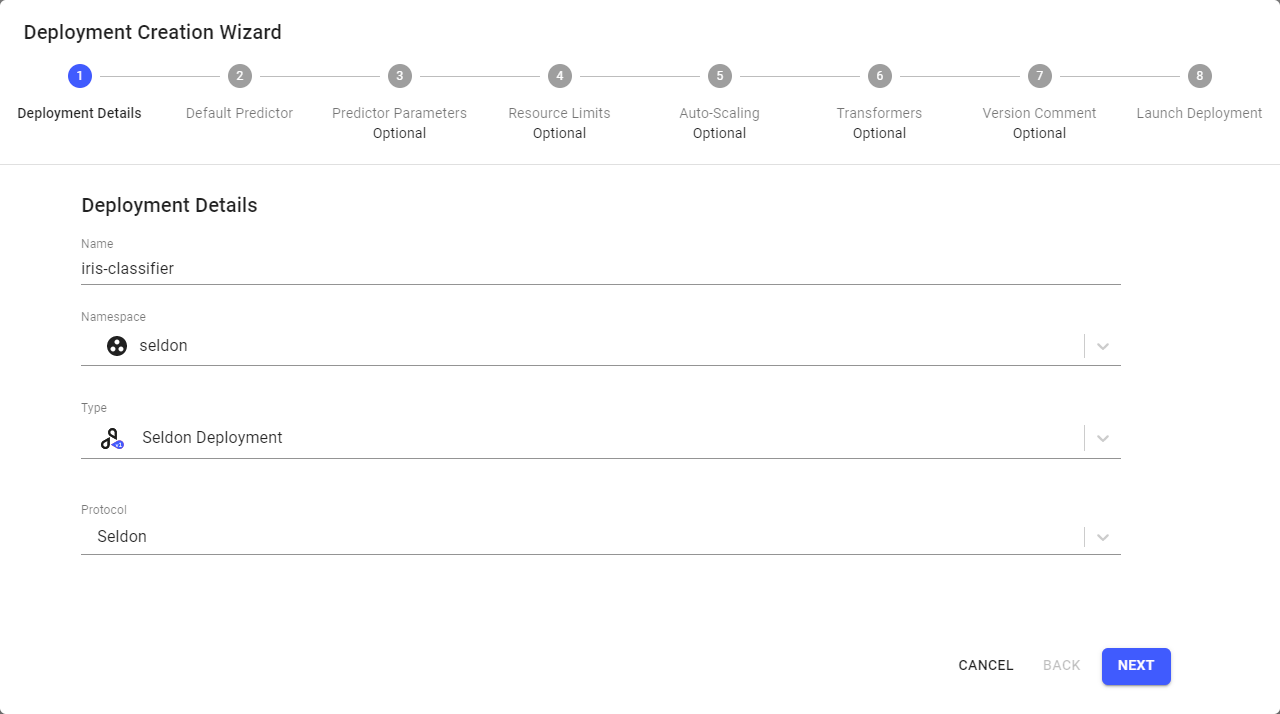
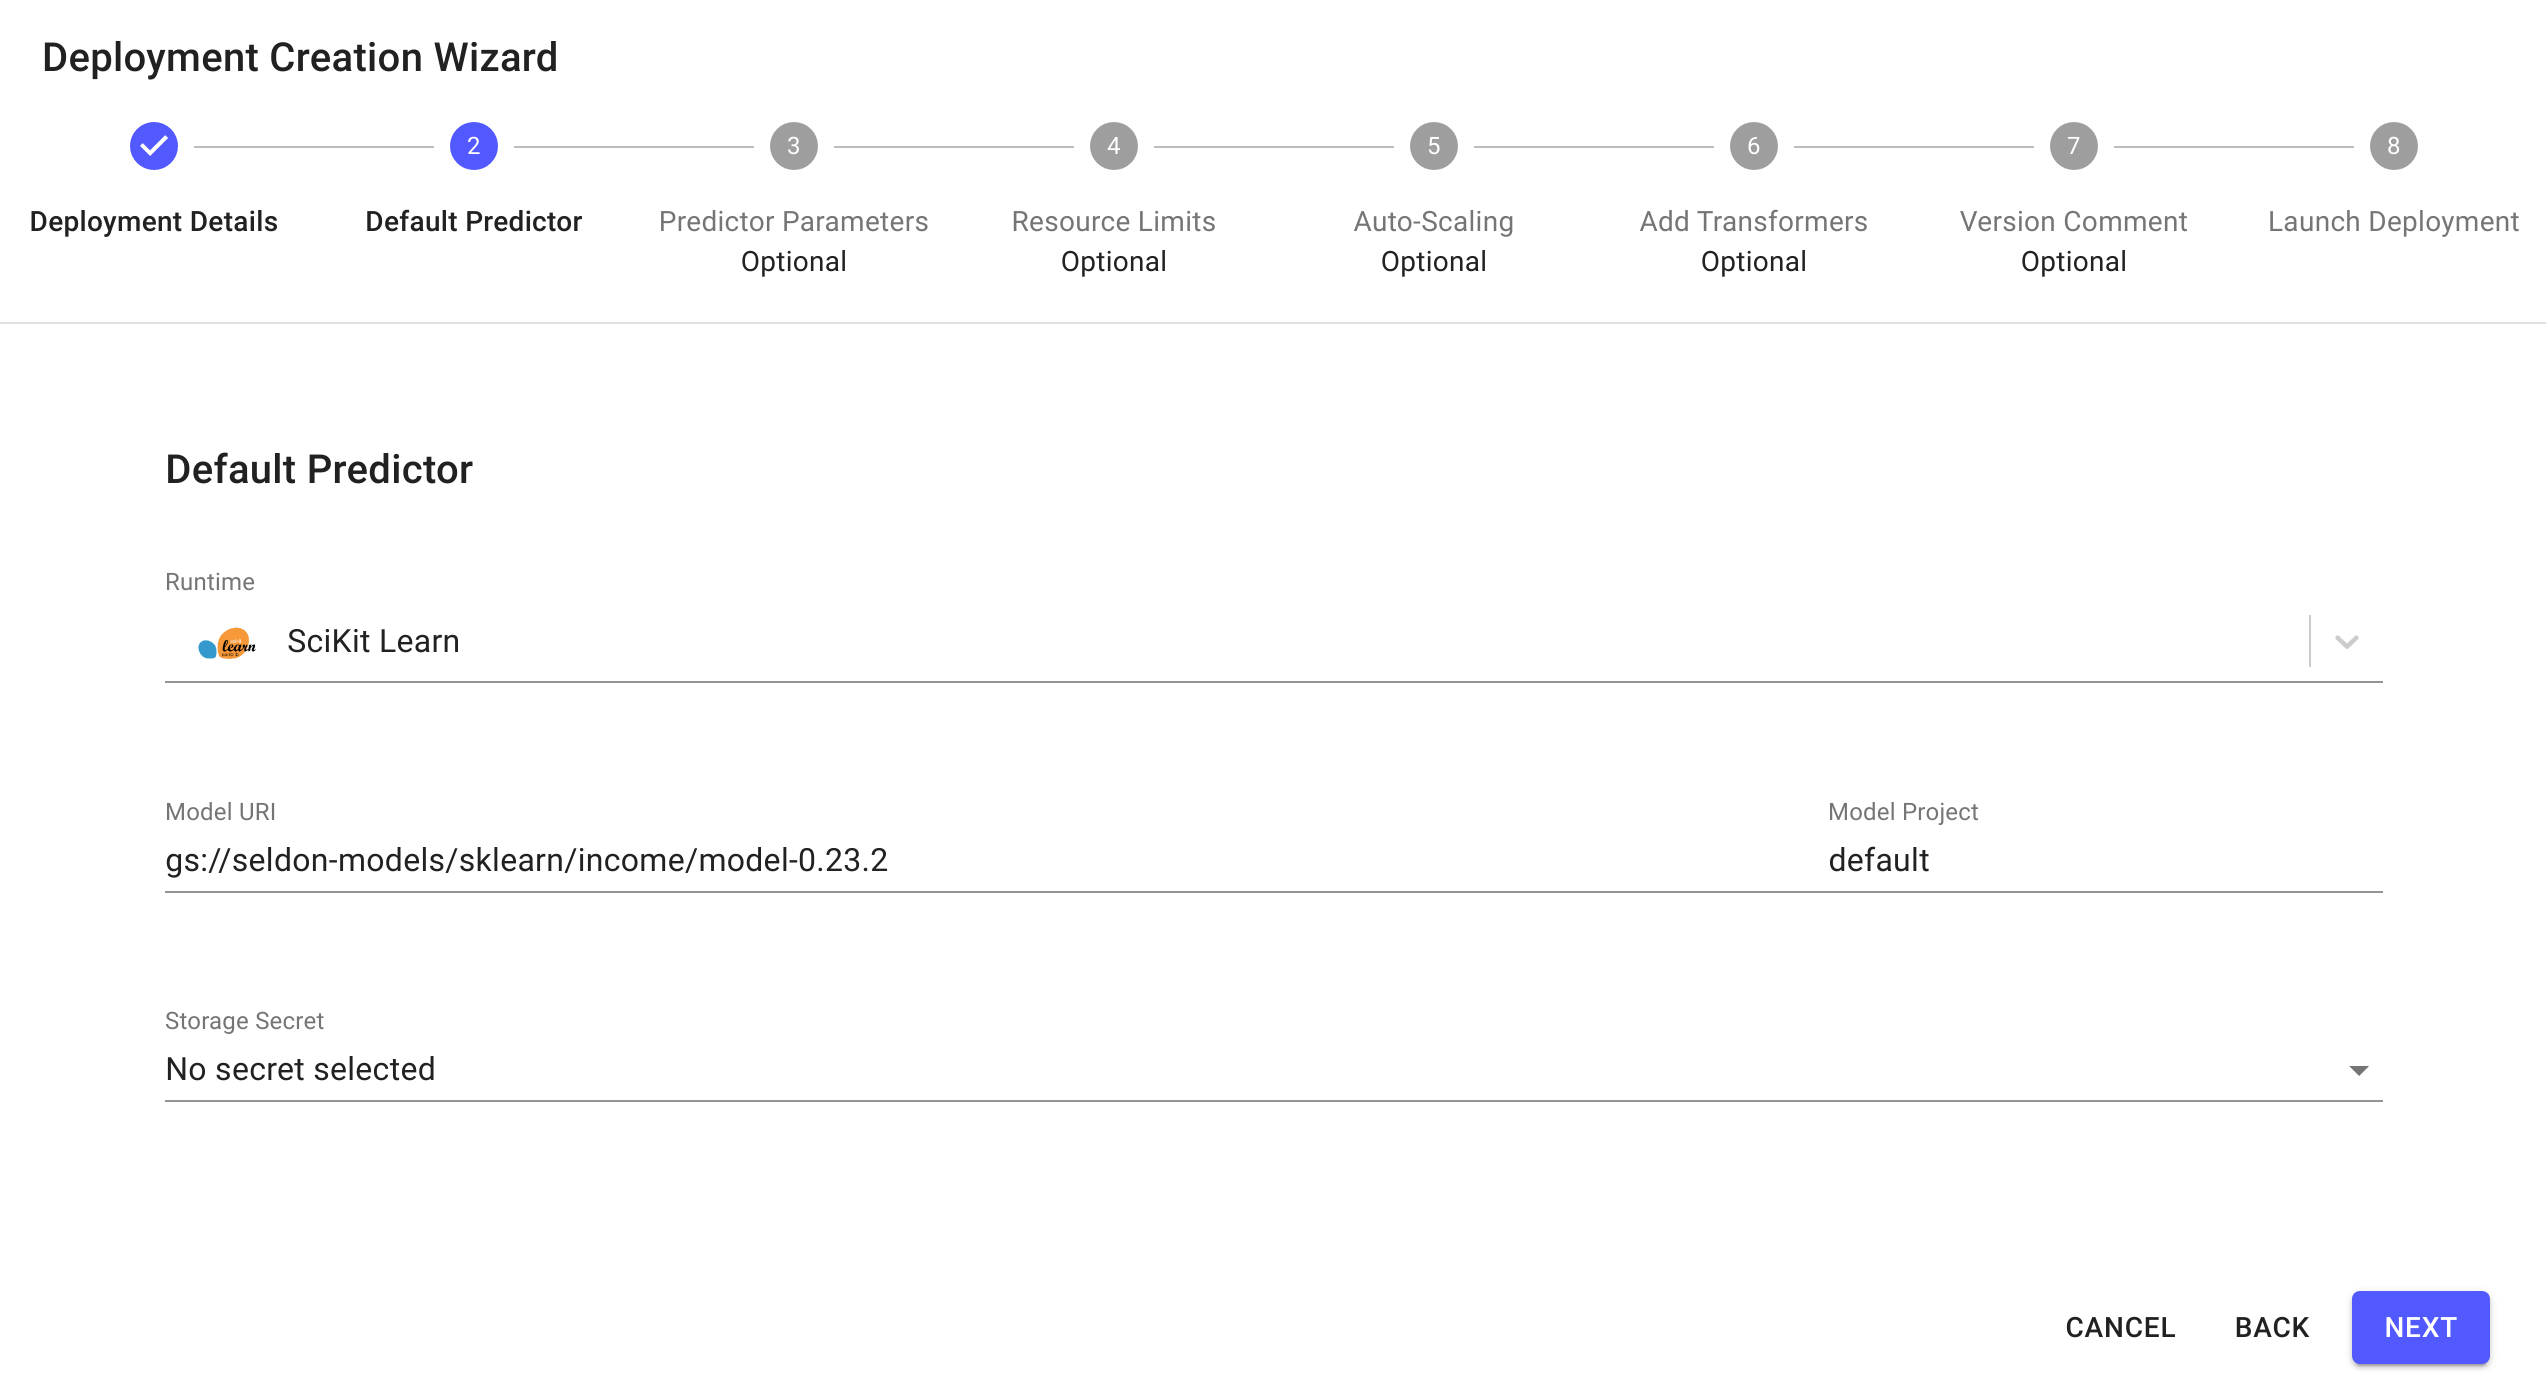
The predictor details should already be filled in from the model catalogue. Click
Next:Expand to see default predictor details
Click
Nextfor the remaining steps, then clickLaunch.
Make predictions using the model deployment
Model predictions can be made in the appropriate protocol. In this demo, we use seldon protocol, see a single prediction payload example below,
{
  "data": {
    "names": [
      "Age",
      "Workclass",
      "Education",
      "Marital Status",
      "Occupation",
      "Relationship",
      "Race",
      "Sex",
      "Capital Gain",
      "Capital Loss",
      "Hours per week",
      "Country"
    ],
    "ndarray": [[53, 4, 0, 2, 8, 4, 2, 0, 0, 0, 60, 9]]
  }
}
Distributions monitoring is especially useful to keep track of predictions when a model makes thousands of predictions in real world scenario. To simulate such a use case, we can utilize the batch jobs feature by:
Downloading the
predictions data file. This is a dataset which contains60 predictions.Uploading the data to a bucket store of your choice. This demo will use MinIO and store the data at bucket path
minio://predictions-data/predictions.txt. Do not forget to configure your storage access credentials secret - we have it asminio-bucket-envvarshere. Refer to the batch request demo for an example of how this can be done via the minio browser.Running a batch job with the configuration below. This runs an offline job that makes a prediction request for every row in the file at
minio://predictions-data/predictions.txtevery5 seconds:Input Data Location: minio://predictions-data/predictions.txt Output Data Location: minio://predictions-data/output-data-{{workflow.name}}.txt Number of Workers: 1 Number of Retries: 3 Batch Size: 1 Minimum Batch Wait Interval (sec): 5 Method: Predict Transport Protocol: REST Input Data Type: ndarray Object Store Secret Name: minio-bucket-envvars
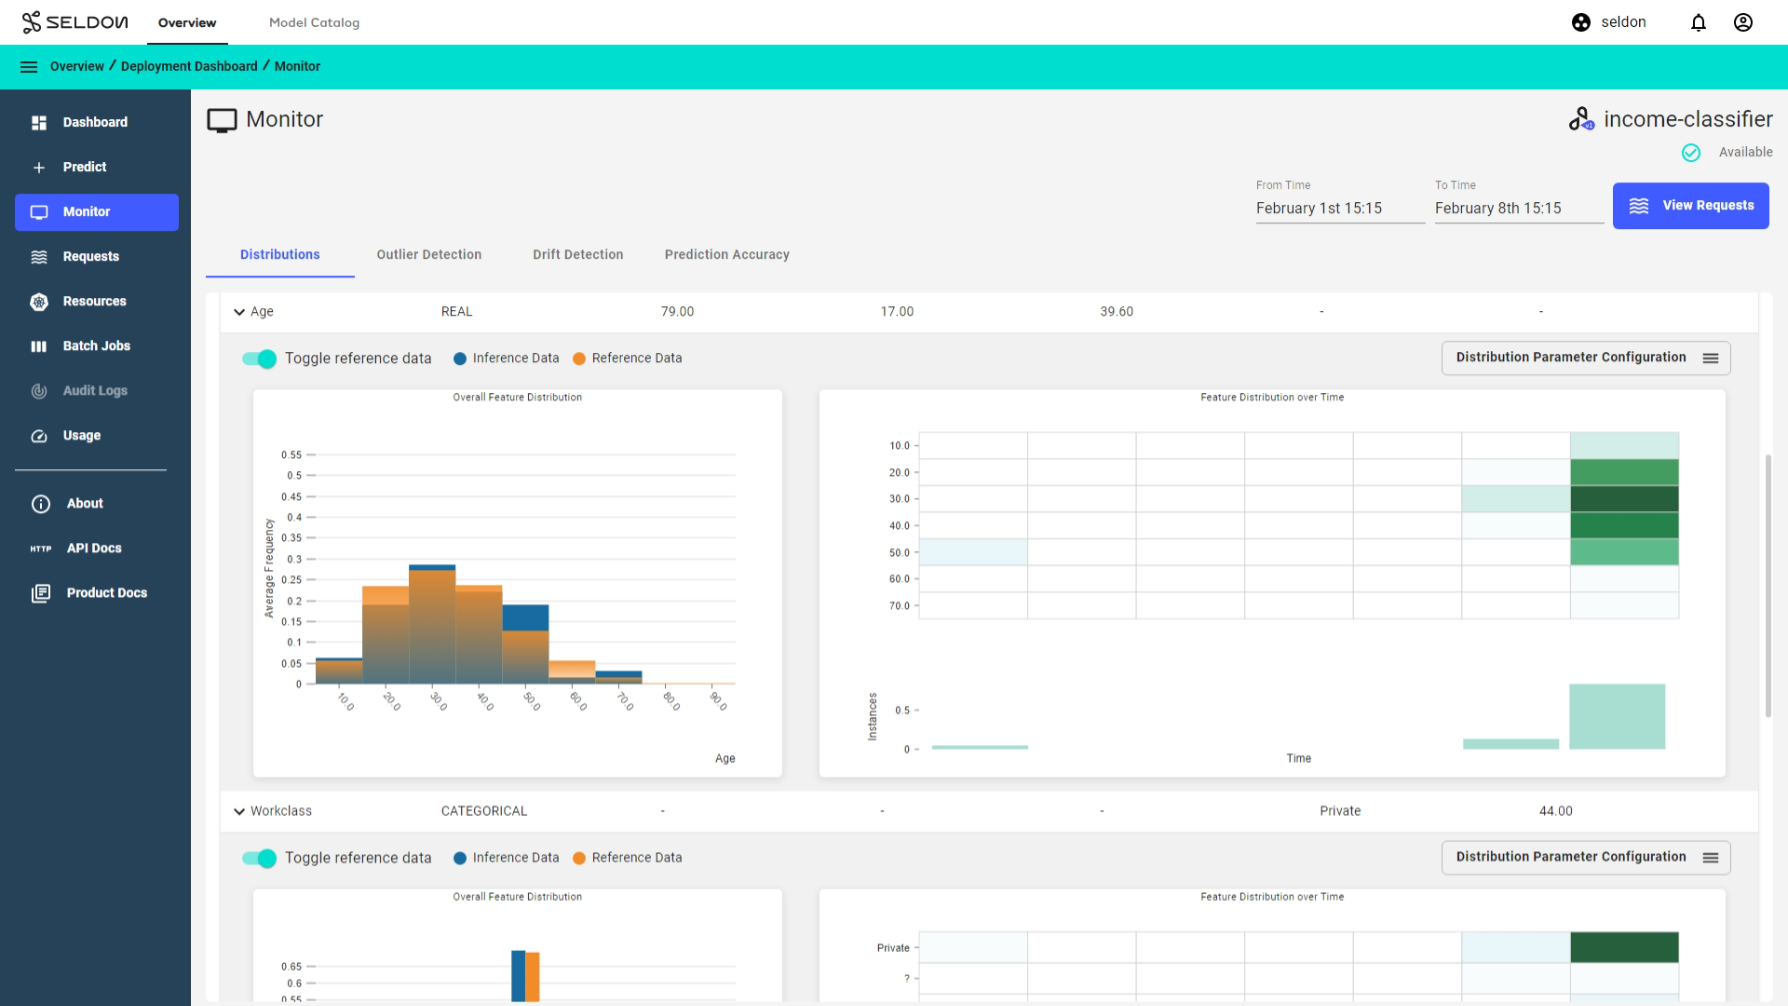
Observe predictions and feature distributions
Select the income classifier deployment and go to the monitor section to view the predictions and feature distributions.
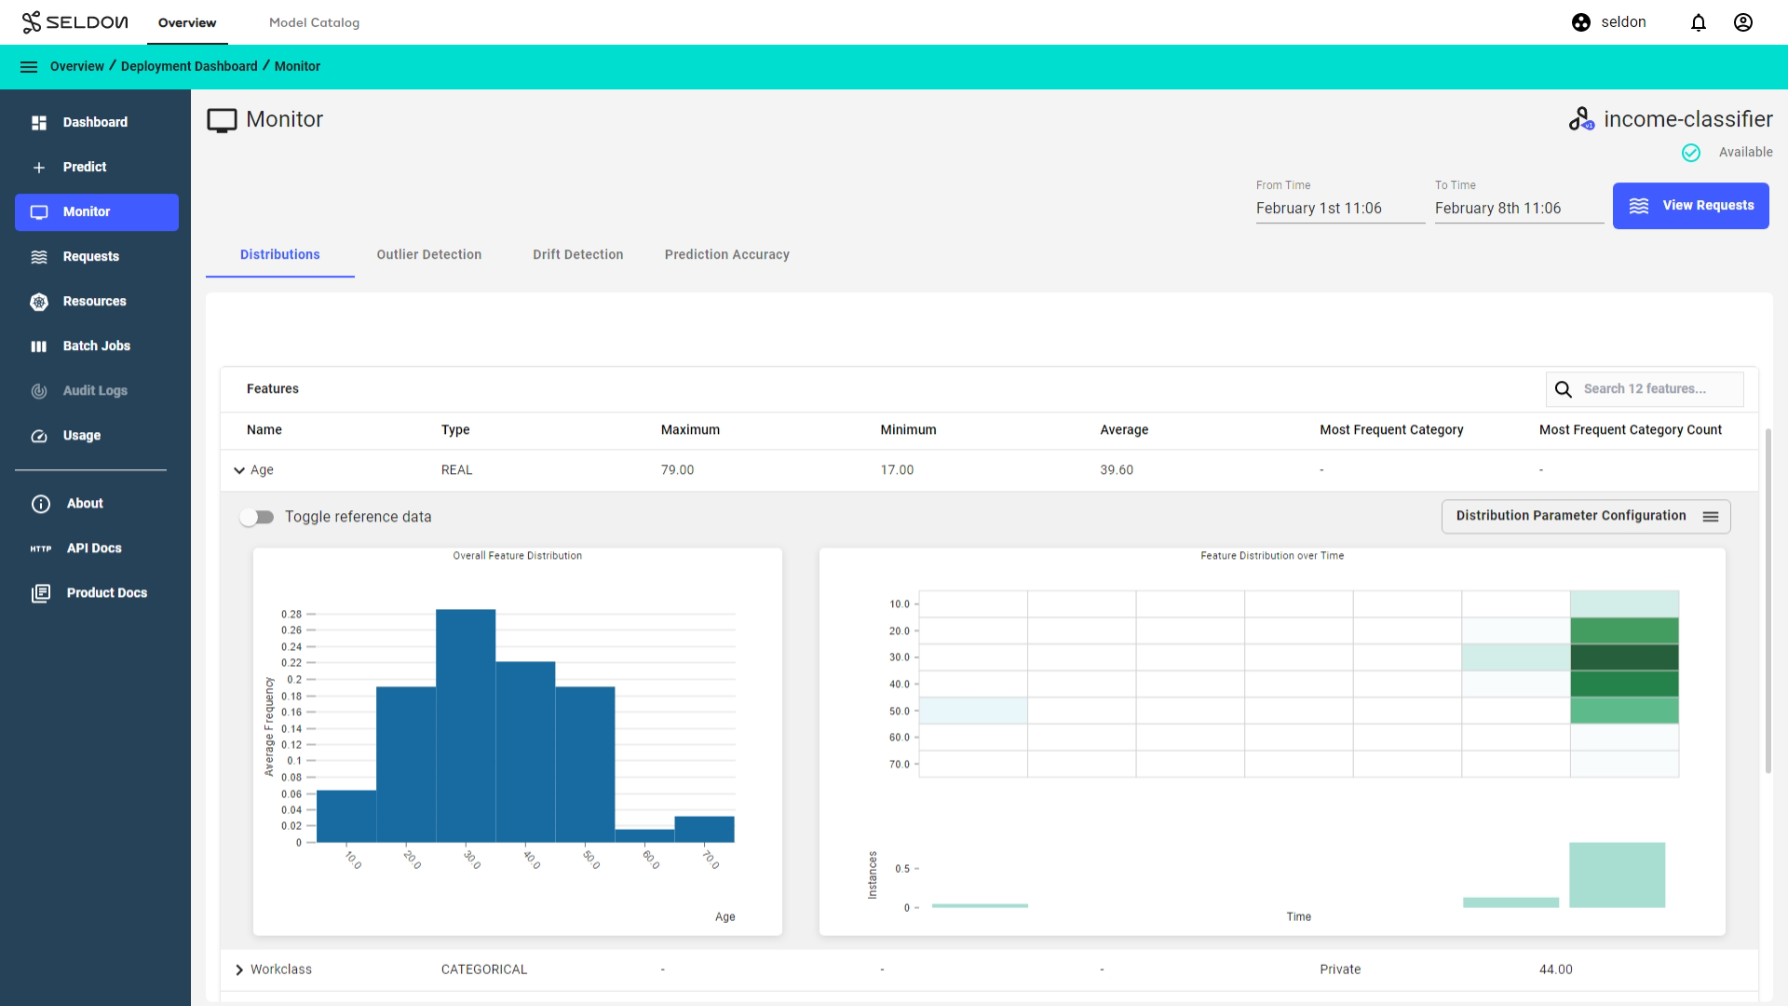
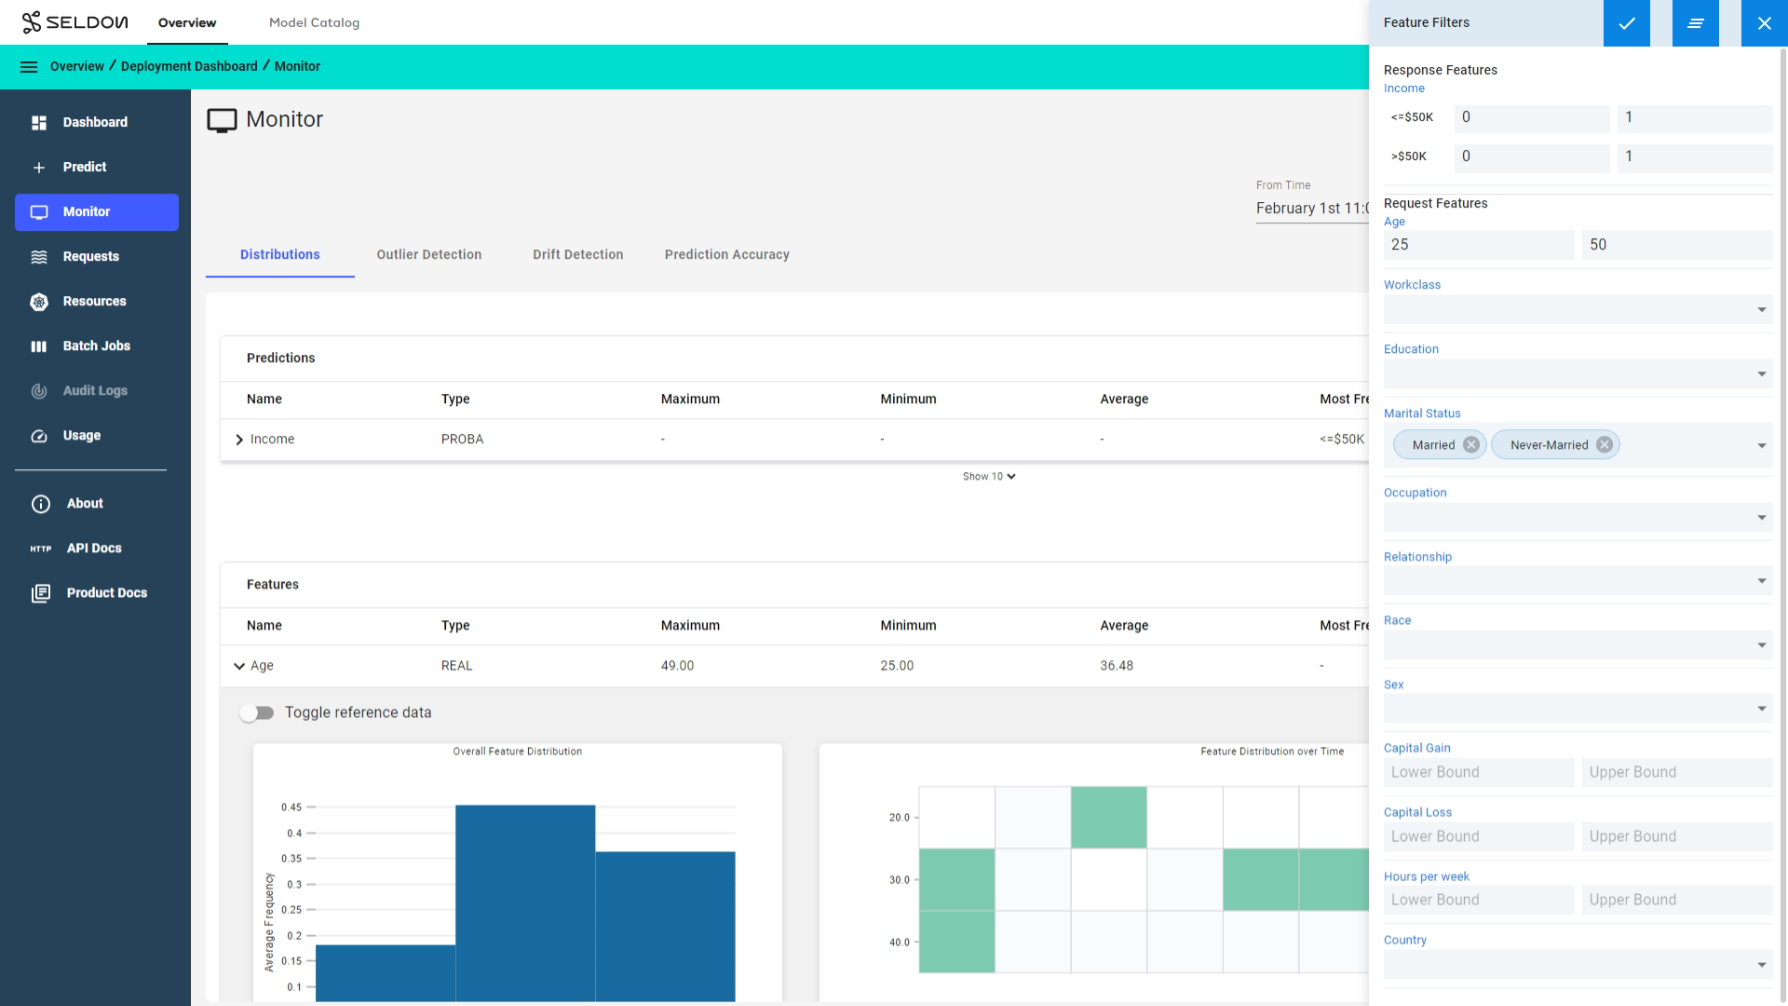
Filter distributions by time or feature level filters
Filter distributions by time or predictions and feature level filters to compare different cohorts and further analysis. For example let’s look at the predictions for all individuals in the Age group 25-50 and also filter by their Marital Status as Married and Never-Married only and see how the average prediction frequency changes for this cohort.
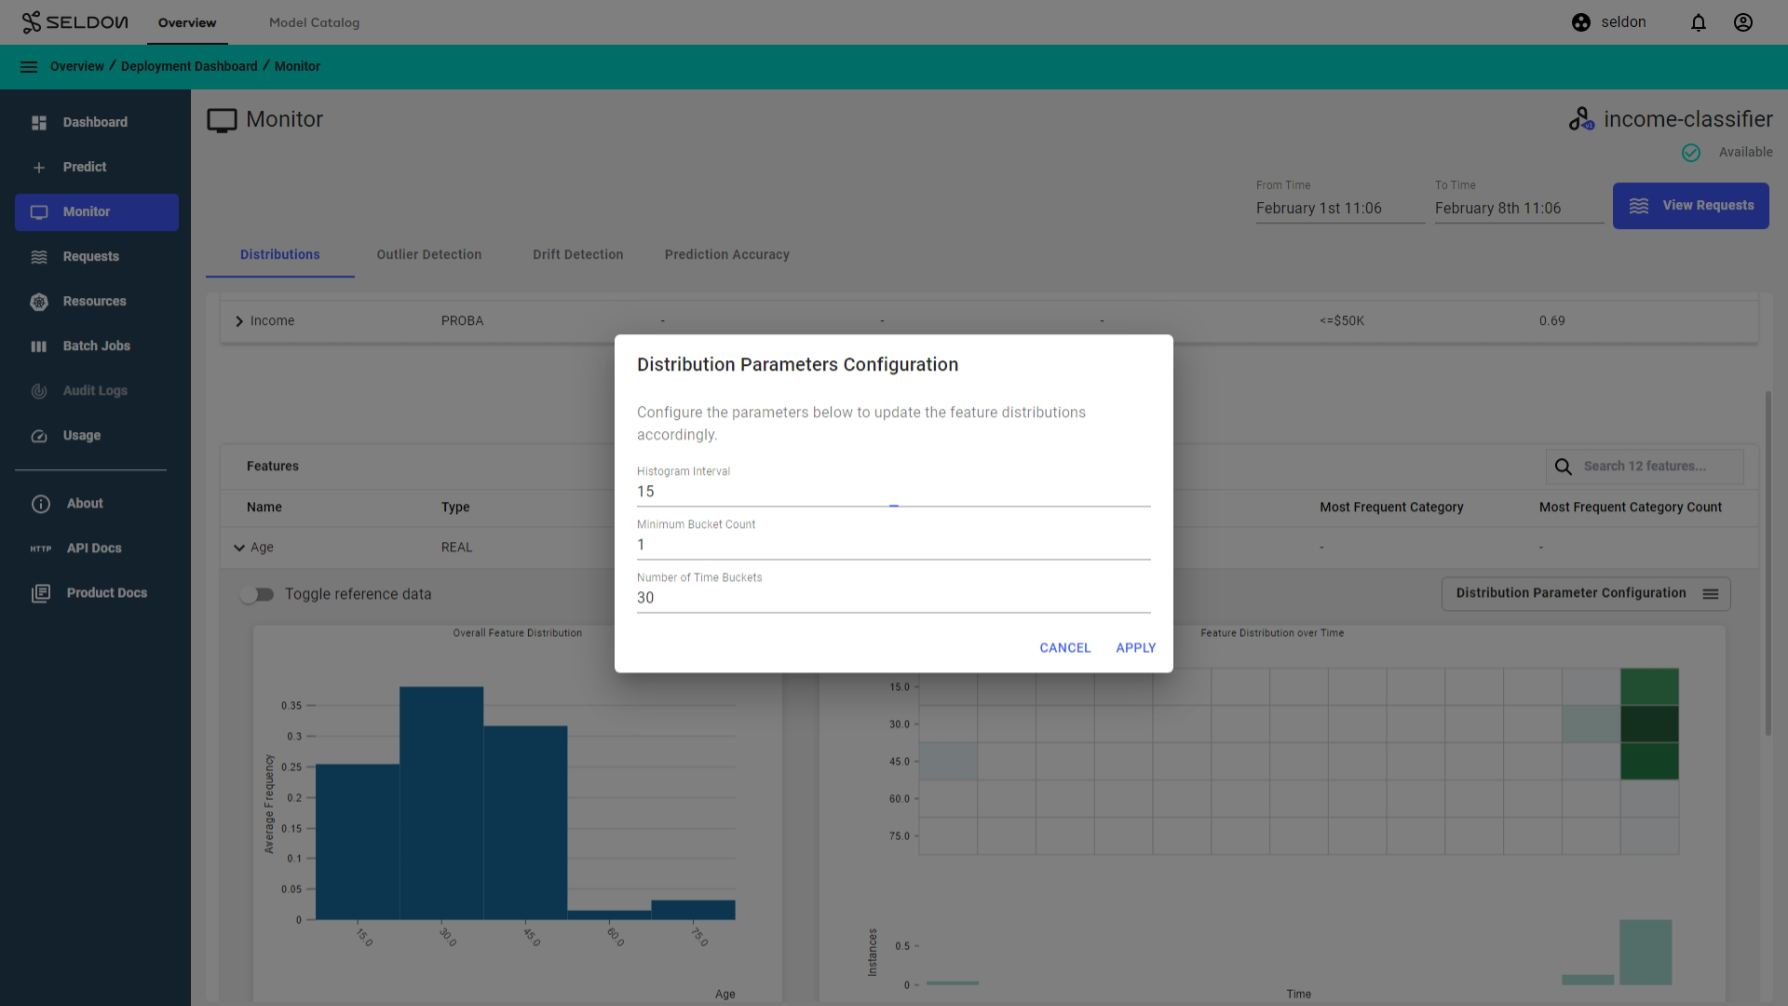
Configuring parameters
Distributions parameters configuration allows you to configure your charts for further analysis. For example let’s look at at the charts in the Age group and change the Histogram interval to 15 and Number of time buckets to 30 to see.
Reference Data Distributions Comparison
Note
This feature is experimental and has very limited functionality and only tabular reference data is supported.
A useful feature for monitoring feature distributions is the ability to compare features against features from a reference dataset. Feature level comparisons allow users to easily gauge which features are actually drifting visually.
Here, we define reference data as a set of data where the distribution of the data is a useful representation of the expected live predictions. Typically, this would be a sampled subset of the training data used to create the inference model.
In this section of the demo, we will extend the distributions monitoring demo and:
Show how reference data needs to be prepared before it can be inserted into Seldon Enterprise Platform
Create a bucket and upload some reference data onto minio
Trigger a retrieval job via the Seldon Enterprise Platform UI
Toggle the comparison of live predictions and reference data feature distributions
Preprocess Reference Data
Important
Only tabular data that has been processed and saved in csv format can be retrieved and inserted into Seldon Enterprise Platform as reference data.
Note
There are no PROBA or ONE_HOT features in the income dataset used in this demo so no preprocessing is required. Instead, we’ll use the Iris dataset.
Currently, there is a strict requirement for the types of data that can be inserted into Seldon Enterprise Platform that is dependent on the prediction schema.
The number of columns in the reference data must match the number of expected columns from the prediction schema. This means that some feature types, (i.e.
ONE_HOTandPROBA) may need to be split into dummy/indicator values. For example, aPROBAfeature (e.g. the Iris Species form the Iris Dataset) might have 3 categories in the schema:{ "name": "Iris Species", "type": "PROBA", "dataType": "FLOAT", "schema": [ { "name": "Setosa" }, { "name": "Versicolor" }, { "name": "Virginica" } ] }
However, the raw reference dataset represents this feature as a single column where the values are its categories. This is typically the case for output features where the reference data has the expected real output, while the model returns a probability distribution of the different possible outputs:
Iris Species
Versicolor
Setosa
Virginica
Virginica
Setosa
The processed data should have the following format
Setosa
Versicolor
Virginica
0
1
0
1
0
0
0
0
1
0
0
1
1
0
0
The order of columns must match the prediction schema
Both “input” and “output” features must be in the reference dataset, where “input” features come before “output” features.
An example subset of the income dataset’s raw data converted into the processed dataset based on the prediction schema can be downloaded for reference. Here, only one feature needs to be preprocessed - the income feature which is of type PROBA.
Reference Data Storage Bucket
Download the income classifier reference dataset. Store it in a bucket of your choice.
In this demo, we will use minio and create a bucket called reference-data which we can upload the income-reference-data.csv file to.
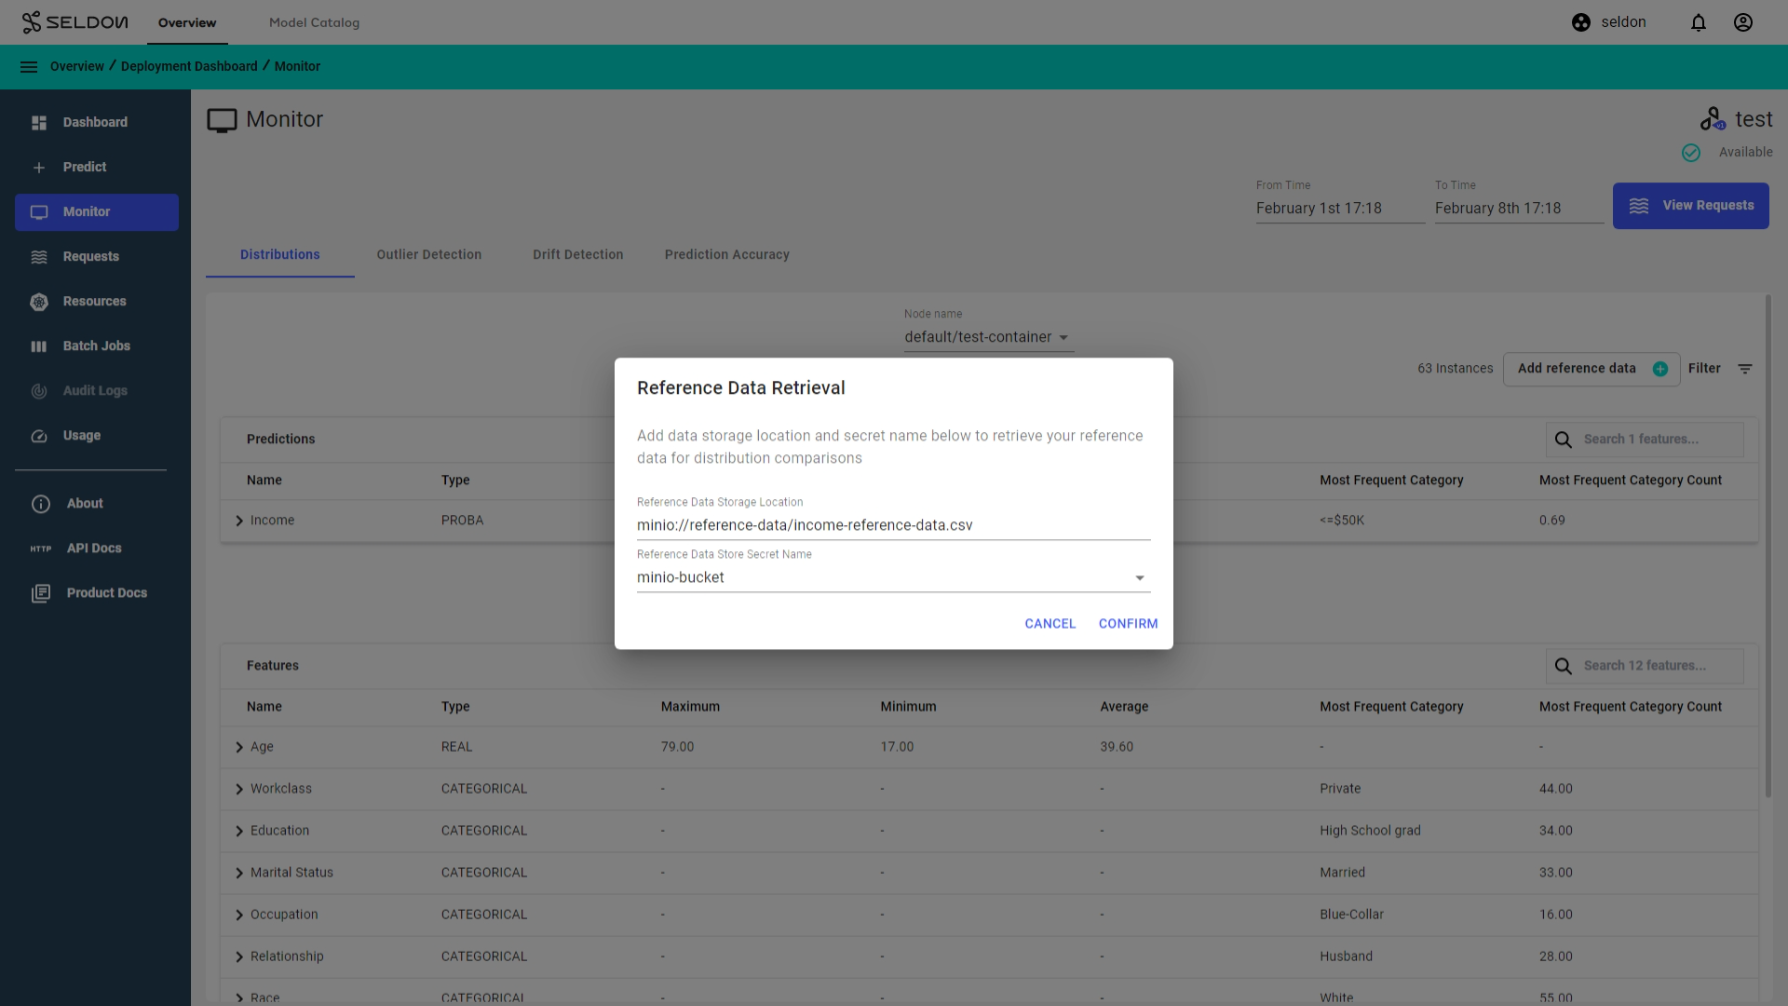
Trigger Add Reference Data Job
In your deployment, navigate to the Monitor page and open the Distributions tab. An ADD REFERENCE DATA button should be available.
This button opens a wizard where the bucket path and secret can be specified. For this demo, use the following values:
Bucket Path:
minio://reference-data/income-reference-data.csvBucket Secret:
minio-bucket-envvars
Note
Here minio-bucket-envvars is a pre-created secret in the namespace containing env vars.
After confirming, the job will start running, and the ADD REFERENCE DATA button will show a RETRIEVING DATA ... status.
Toggle Reference Data Feature Distributions Comparison
Give the job a few minutes to finish. Once finished, the RETRIEVING DATA... button will show REFERENCE DATA AVAILABLE. Now, the Toggle reference data toggle will become available to click for every feature and you can view comparisons of the live prediction distributions against the reference data.
Use the filters to filter both live predictions and reference data.