 Seldon Enterprise Platform Documentation Update
Model Explanations with Image Data
In this demo we will:
Launch an image classification model
Send prediction requests to the model
Create an explainer for the model
Generate explanations for previously sent prediction requests
The model used in this demo was trained to classify images based on the CIFAR10 dataset.
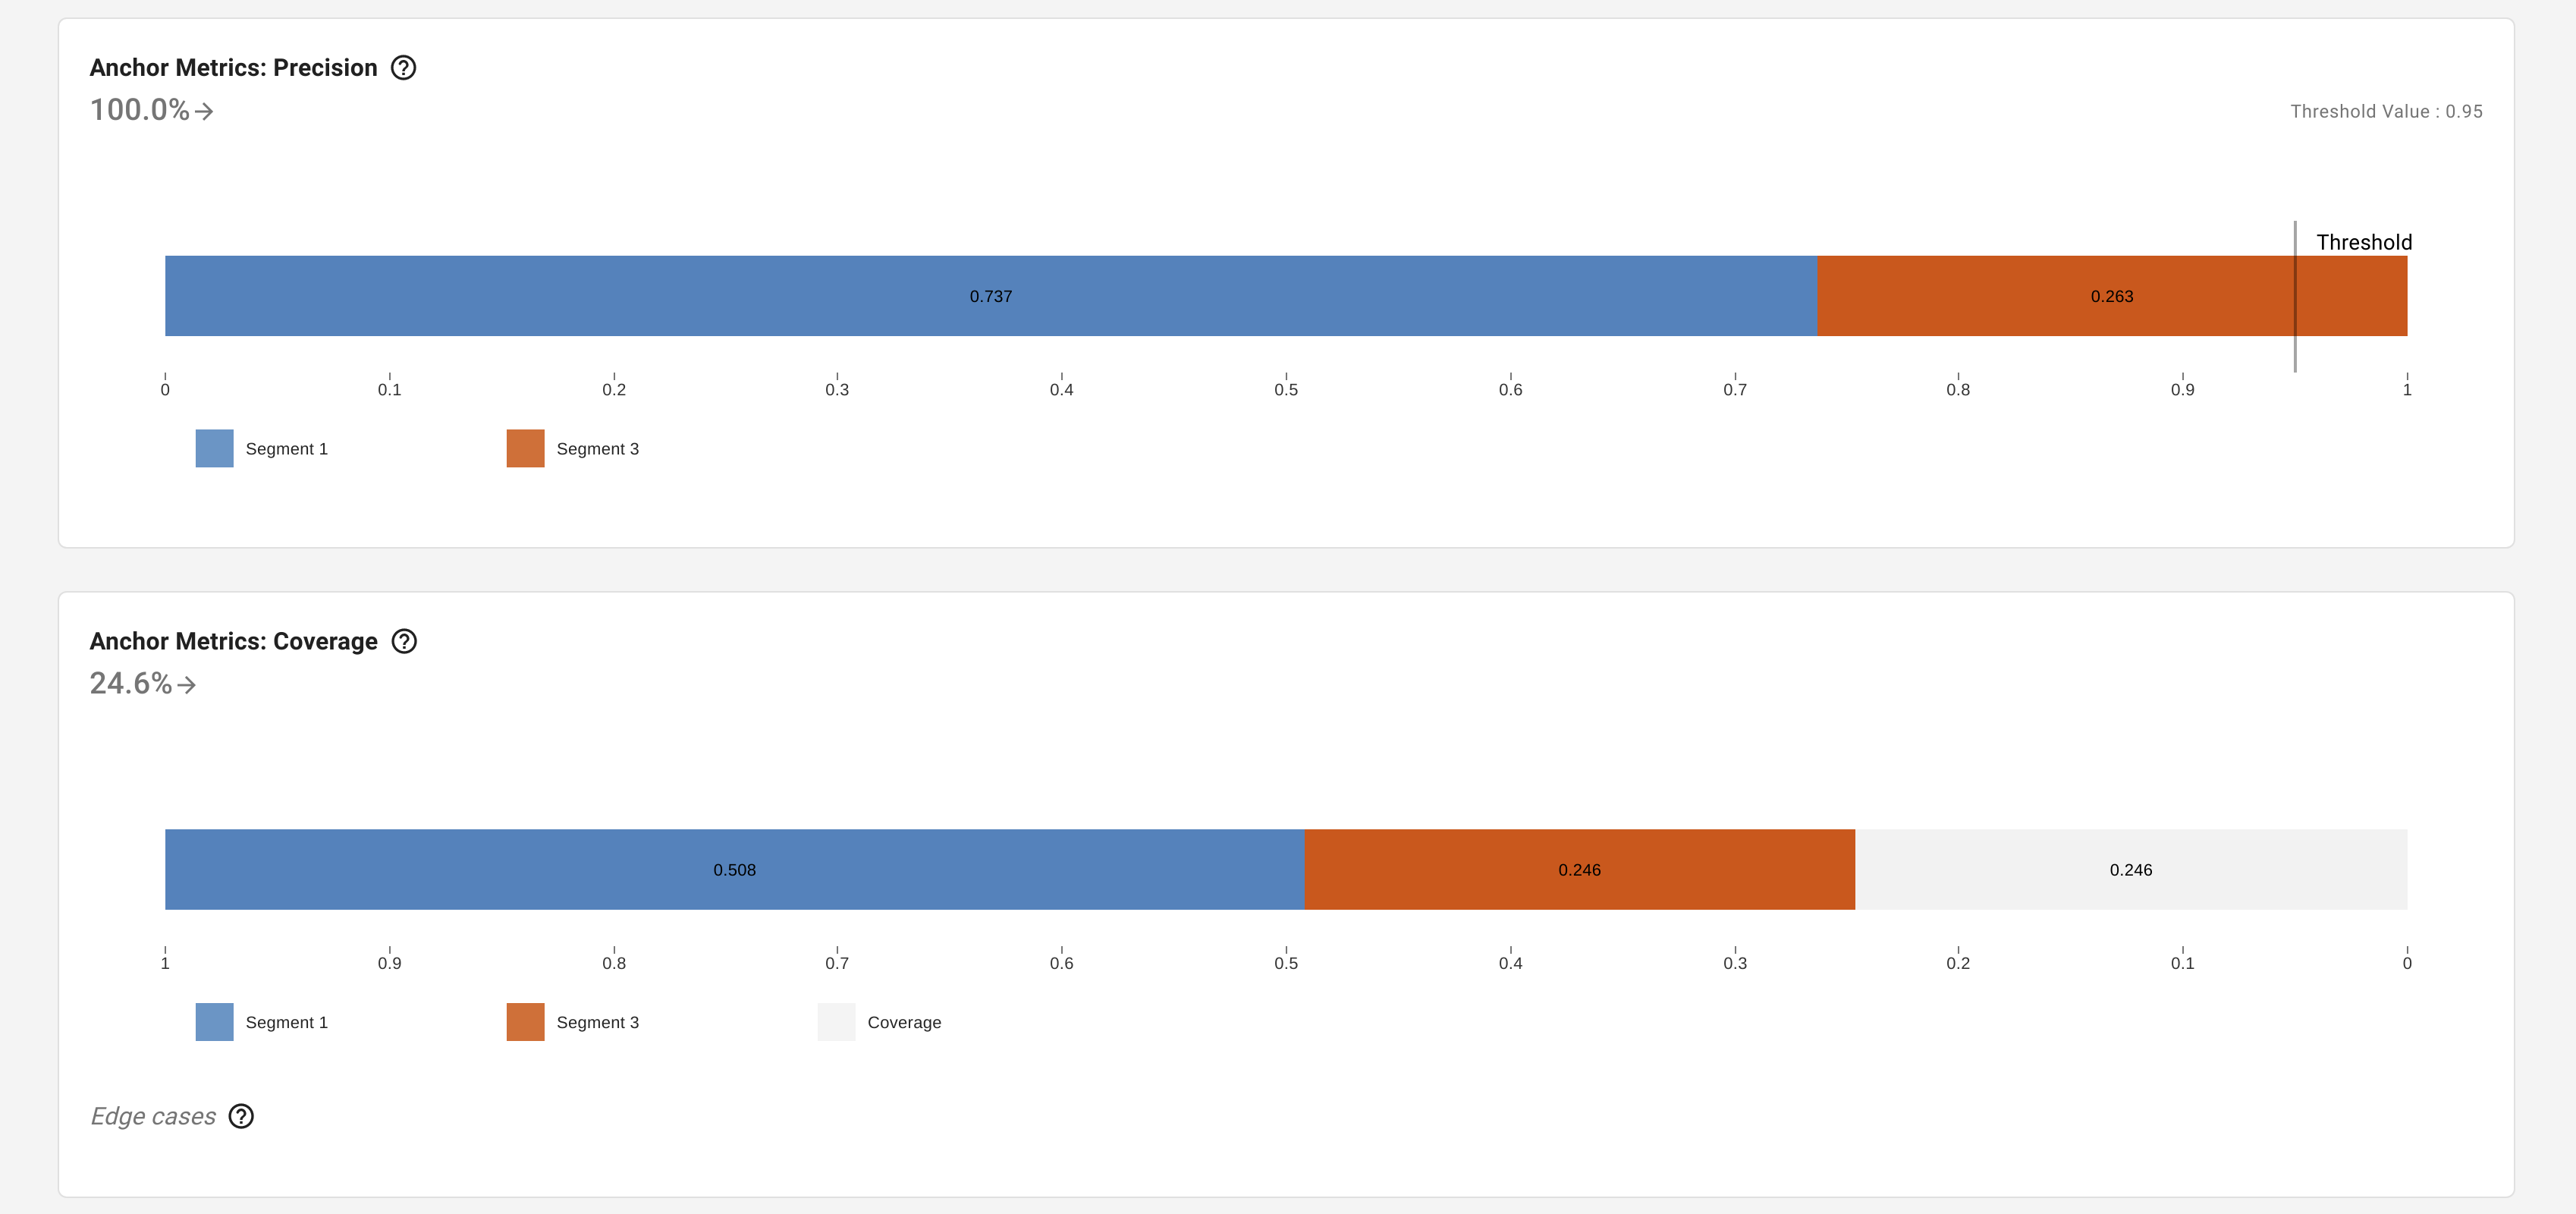
The explainer uses the anchors technique to provide insight into why a particular classification was made by the model. We’ll see the segments in an input image that are the most relevant to the prediction outcome.
Create Model
Click on
Create new deploymentbutton.Enter the deployment details as follows:
Name: cifar10-classifier
Namespace: seldon
Type: Seldon Deployment
Protocol: Tensorflow
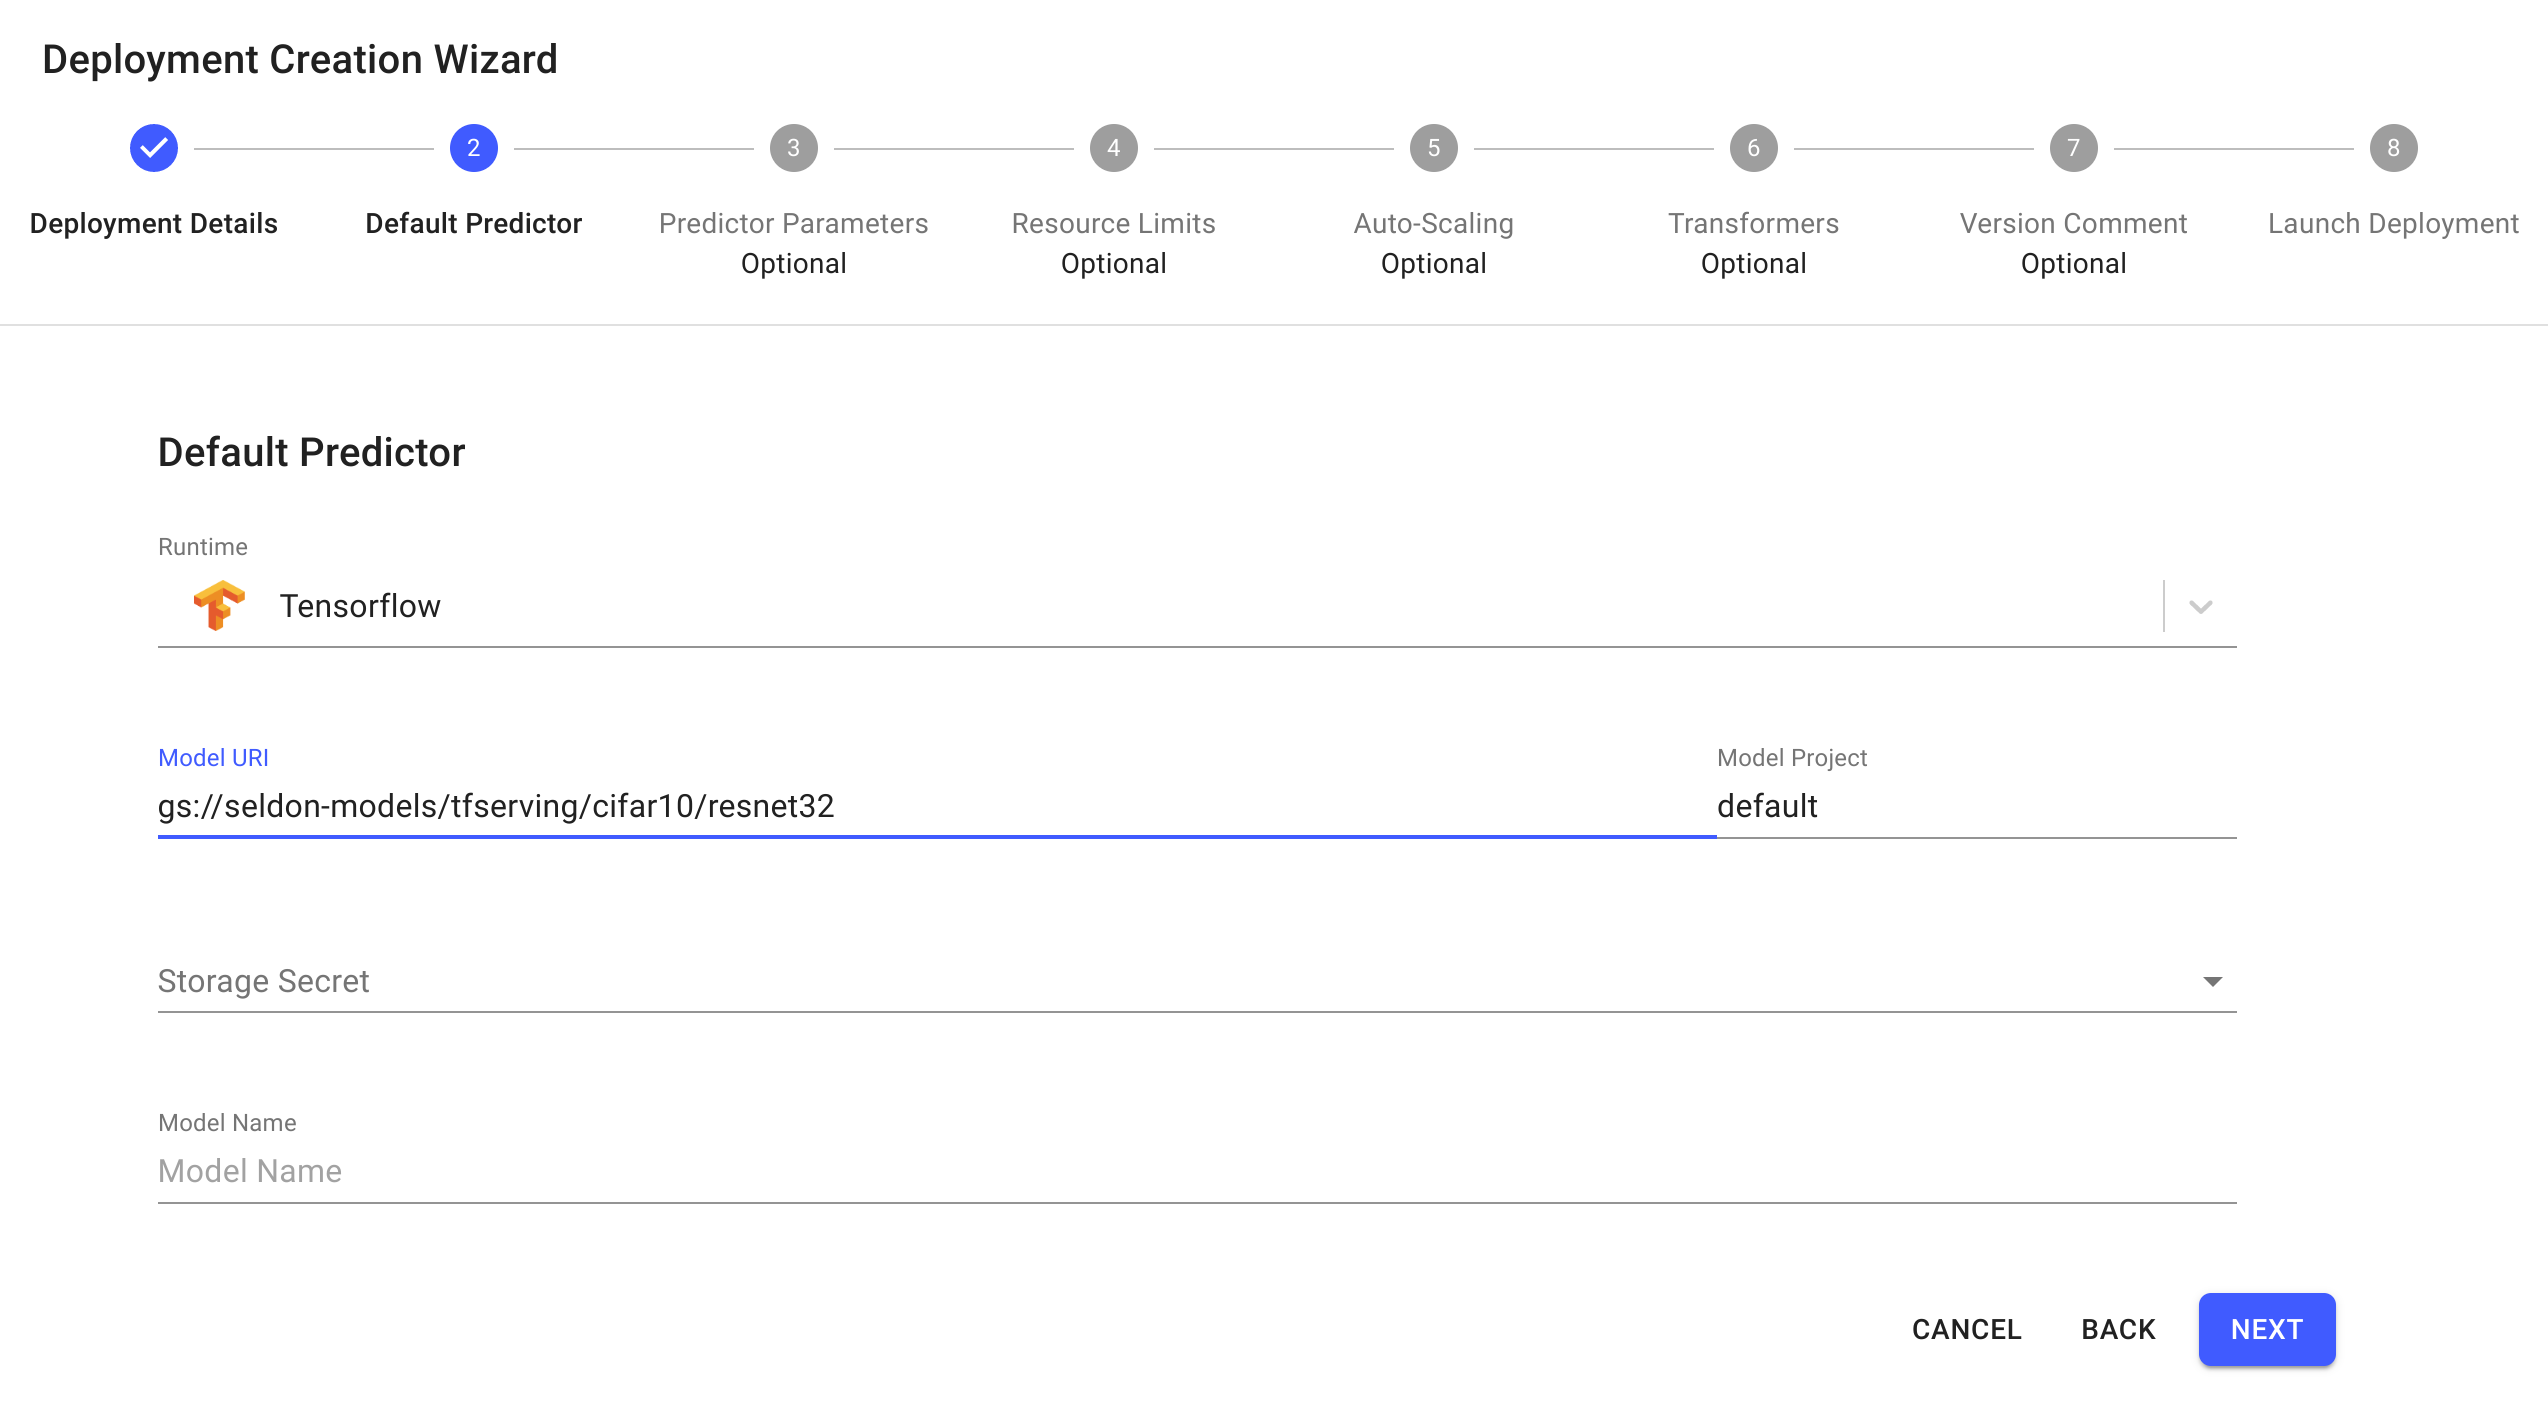
Configure the default predictor as follows:
Runtime: Tensorflow
Model Project: default
Model URI:
gs://seldon-models/tfserving/cifar10/resnet32
Storage Secret: (leave blank/none)
Model Name: (leave blank)
Skip to the end and click
Launch.If your deployment is launched successfully, it will have
Availablestatus.
Get Predictions
We will make a prediction request using the image of a truck.
The image is a JSON file in Tensorflow Serving protocol format.
Click on the
cifar10-classifierdeployment created in the previous section to enter the deployment dashboard.Inside the deployment dashboard, click on the
Predictbutton.On the
Predictpage, click onUpload JSON fileand upload the truck image.Click the
Predictbutton.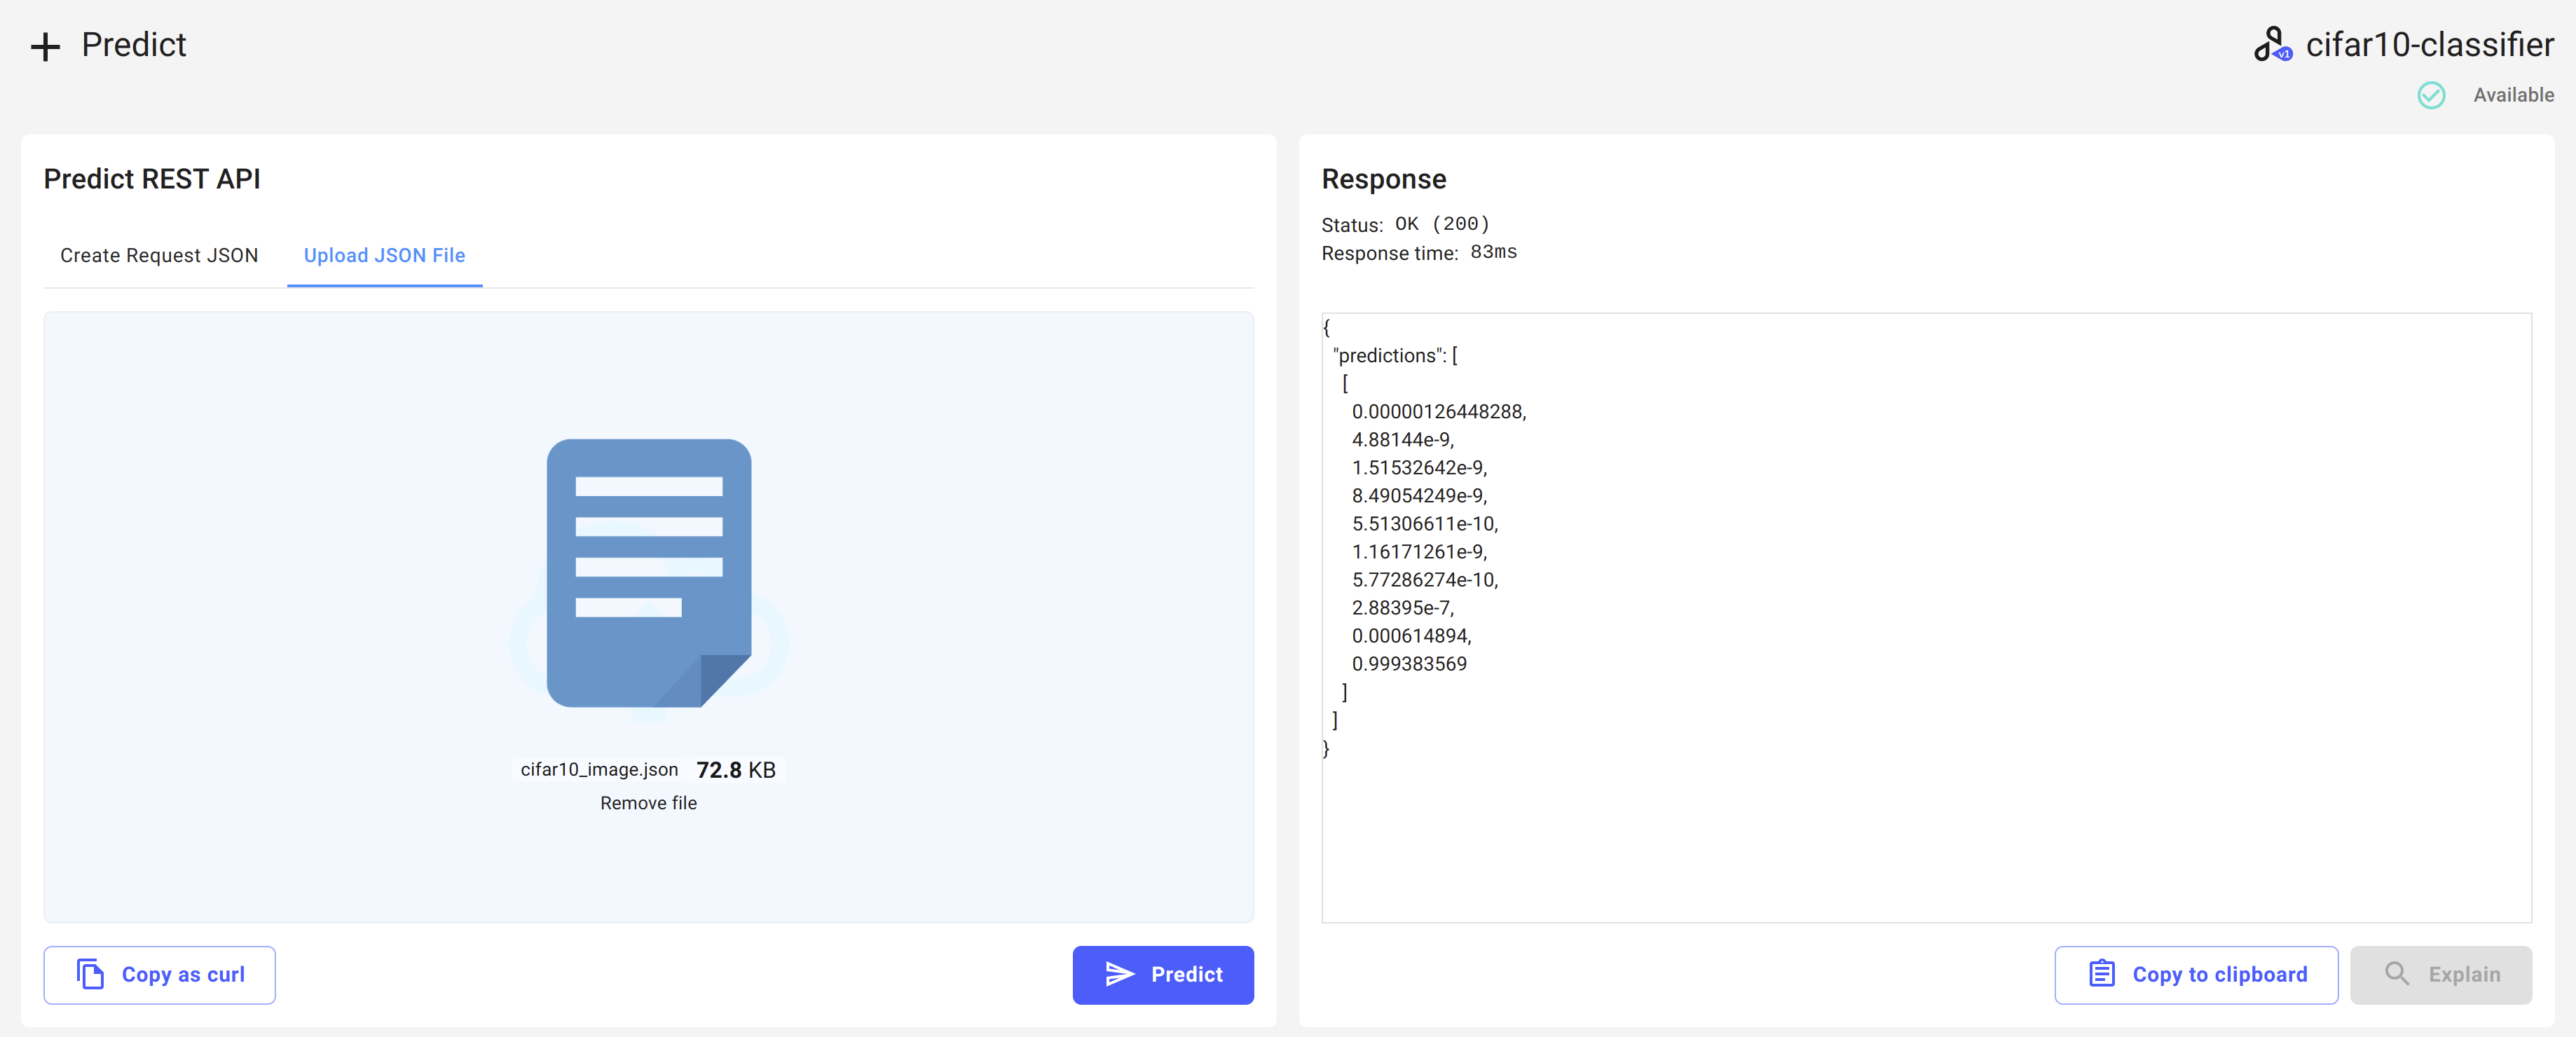
Add an Anchor Images Explainer
From the
cifar10-classifierdeployment dashboard, clickAddinside theModel Explanationcard.For step 1 of the Explainer Configuration Wizard, select
Imagethen clickNext.
For step 2, make sure
Anchoris selected, then clickNext.For step 3, enter the following value for the
Explainer URI:gs://seldon-models/tfserving/cifar10/cifar10_anchor_image_py3.7_alibi-0.7.0
click
Next.Skip to the end without changing fields, and click
Launch.
After a short while, the explainer should become available.
Get Explanation for one Request
Navigate to the Requests page using the left navigation drawer.

Click on View explanation button to generate explanations for the request.
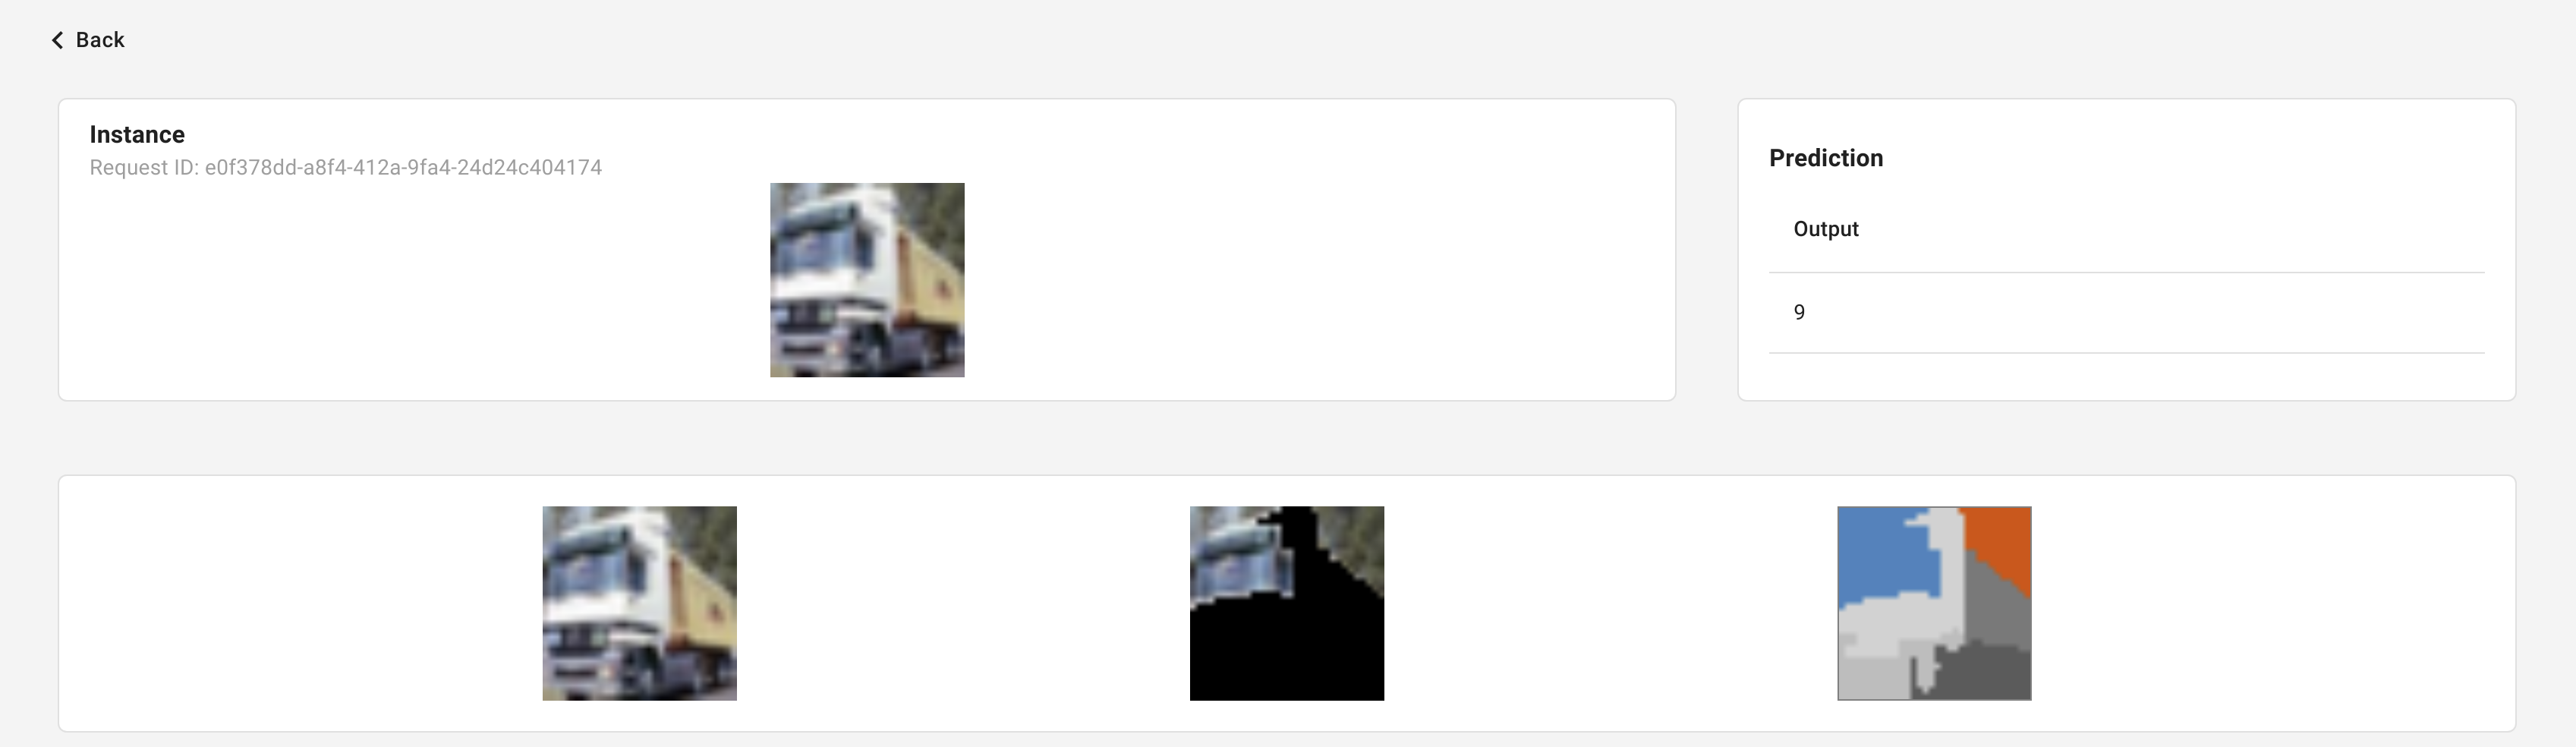
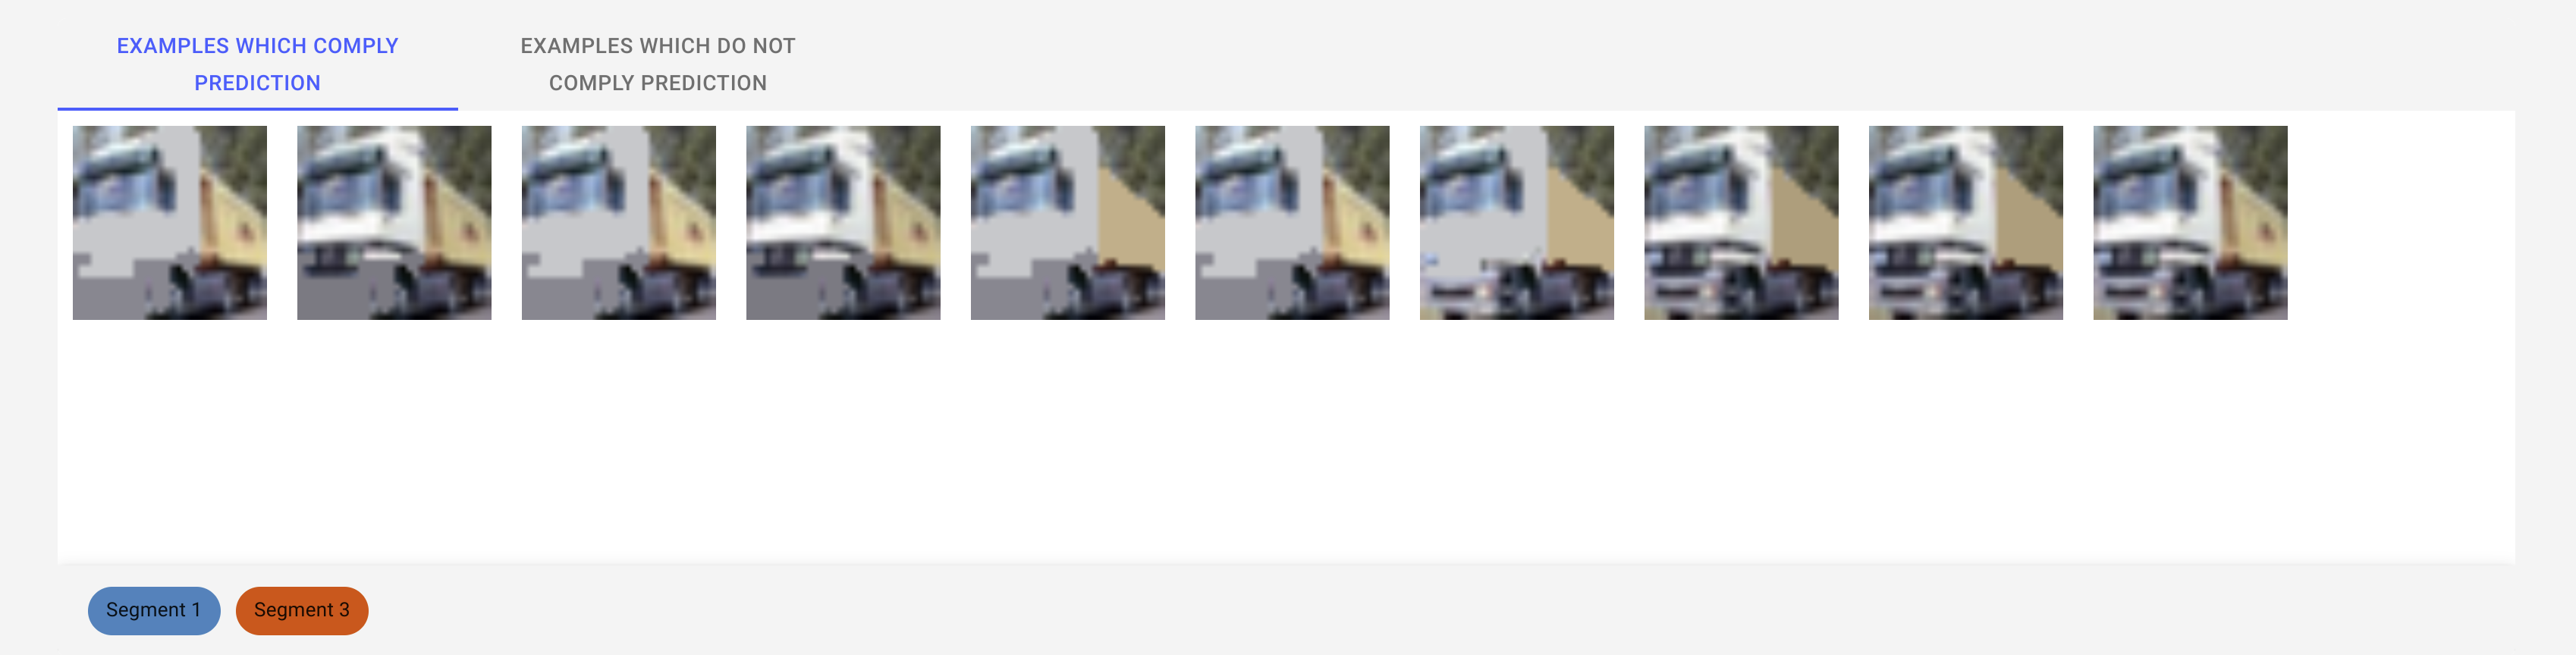
Congratulations, you’ve created an explanation for the request! 🥳
Next Steps
Why not try our other demos? Ready to dive in? Read our operations guide to learn more about how to use Enterprise Platform.